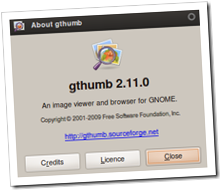
gThumb is an image viewer and browser for the GNOME Desktop that allows users to manage, tag, sort, view and edit their photo collection from the one application. It can import photos directly from digital cameras and export them to web albums and more.
“Change My Dear, And Not A Moment Too Soon…”
In August this year, gThumb tour-de-force Paolo Bacchilega announced on the gThumb Mailing list that the application was to receive some due love and attention – i.e. a total code re-write from scratch.
The reasons behind this was to help make gThumb a more capable and extensible application, handle browsing tasks more efficiently and to take advantage of new libraries, such as clutter.
This post will give you a quick tour of gThumb 2.11.0.
 The next version of gThumb – the 2.11.xx series – brings some exciting new features and user-interface improvements. (Including ditching those baked-in ugly icons!)
The first thing you’ll probably notice when trying 2.11.0 is the speed. Now it may just be me, but it starts up incredibly fast – almost instantly! Of course, gThumb has always benefited from sharing its thumbnail database with nautilus so this obviously helps, too.
More than anything these updates help position gThumb as a real competitor to F-Spot.
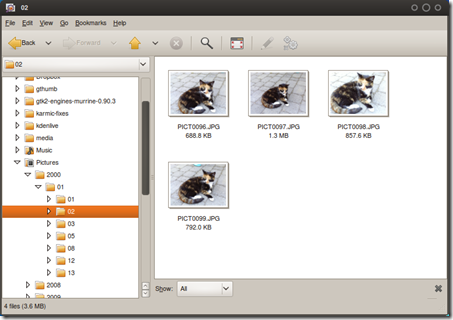
The browsing-view mode has changed a little from the current release. The main “visible” changes being the toolbar which is now far more “file browsing” friendly, utilizing navigation buttons rather than relying using the tree-view to navigate back and forth.

For comparison, here is the current version: –

No More Catalogue?
The “catalog” tool is still available in 2.11.0, but you may be forgven for thinking it wasn’t due to its lack of its inclusion in the new toolbar.
Tree View
The tree view works as it does in the current version.
Irregularities
The pencil icon on the toolbar in browser
mode lets you edit a files’ metadata – adding comments, location, date
and tags, etc. The ‘cog’ icon lets you rotate, resize or set the image
as the desktop wallpaper.
This will inevitably confuse users because, as you will read below, the the same icons do different things in viewer mode…

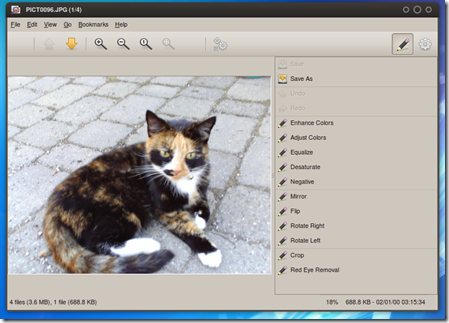
The gThumb viewer has received some attention, too. There are fewer buttons on the toolbar giving it a cleaner, less cluttered look.
Compare the new viewer, above, with the current/old one below: –

There are fewer main menu entries along the top in the new version, with file properties and editing tools as side-panes rather than simple menu items as previously.
Editing

The editing panel is toggled via the ‘pencil’ icon in the far right. As you can see from the picture above, it comes with most of the editing tools found in the current version – and includes the most popular editing options such as red-eye removal, rotation and auto-enhancement.
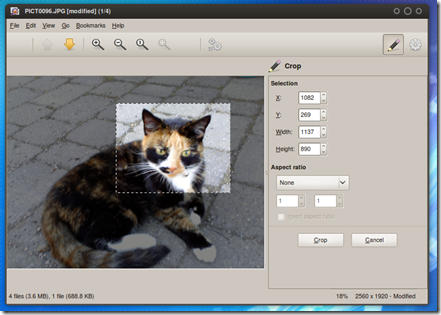
Each editing tool, when selected and if applicable, will either show the configuration options available in the same pane.
For example, in the screenshot below the crop tool selected. The cropping options appear in the same right-hand pane – no extra windows or pop-ups: –

Properties
The properties panel can also be toggled in a similar fashion to the editing pane; simply press the ‘cog’ icons to see the currently viewed photograph’s vital stats such as size, format, metadata, tags, etc.
No Export, Hable.
This development version doesn’t support exporting to web-albums or photo services. This is likely only a temporary omission.
Play spot the pixel with you photos
The default “viewer mode” is set to view at “actual size” – an incredible oversight for a photo viewer. 8 mega-pixel holiday snaps at “actual size”, anyone? You can change this in the preferences menu.
Install
Enough of the breezy stuff, you probably want to install this, right? Well first make sure you’ve read what it can and cannot do before rushing into installing it.
You’ll need to install the following list of dependencies, adding git-core to the list if you don’t already have it installed: –
sudo apt-get install git-core autoconf libgnome2-dev libgtk2.0-dev libgnomeui-dev libexiv2-dev libglade2-dev gnome-common libgphoto2-2-dev libgnomedesktop2.20-cil gnome-devel libunique-dev
Once that is done, we’ll get the source using: –
git clone git://git.gnome.org/gthumb
navigate into the source folder using: –
cd gthumb
Followed by: –
git checkout -b ext origin/ext
and then: –
./autogen.sh –prefix=/usr CFLAGS=”-ggdb”
(NB: I received errors regarding “missing” dependencies that were already installed using the above command. Using just ./autogen.sh worked fine for me.)
To install it, use: –
make&& sudo make install
(or make && sudo checkinstall if that is your preference)
You can then launch gThumb 2.11.0 from the Graphics menu.
