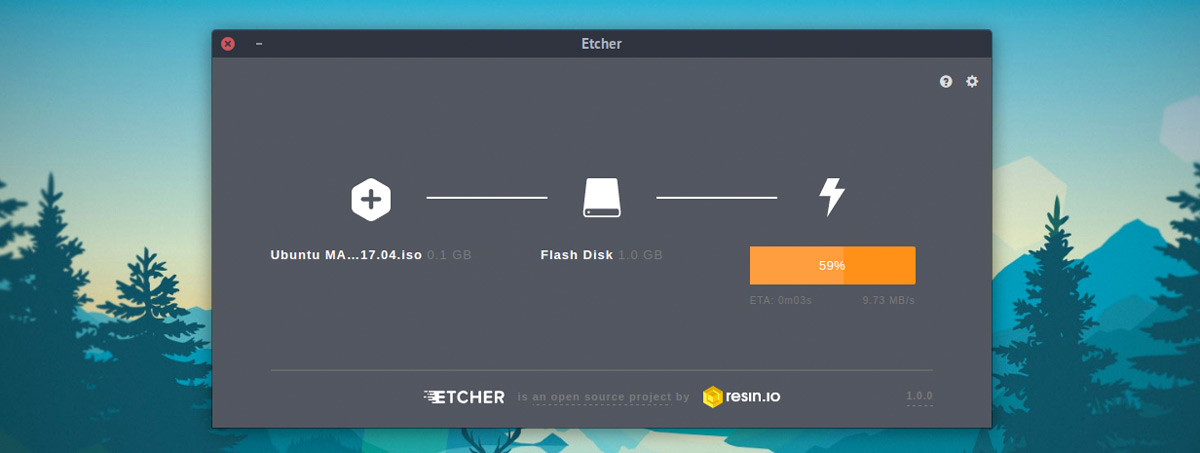
Etcher is a fantastic open-source USB image writer tool for Windows, macOS and Linux — and a new stable release recently popped out.
The latest version of the tool doesn’t add any dazzling new features but it does improve on the image writer’s core feature set. Y’know: the thing you actually use it for.
It’s developed by software company Balena who say the newest release is “more stable and reliable” than before.
Before I show you how to install Etcher on Ubuntu 18.04, 20.04, and later let’s recap what this tool is and why you might need it.
A Recap of Etcher Features
As you may know if you read our list of the best Electron apps, Etcher is a truly cross-platform tool. You can use it on Windows, macOS and Linux. Regardless of which OS you use Etcher can write .iso, .img and .zip files to USB drives and SD cards.
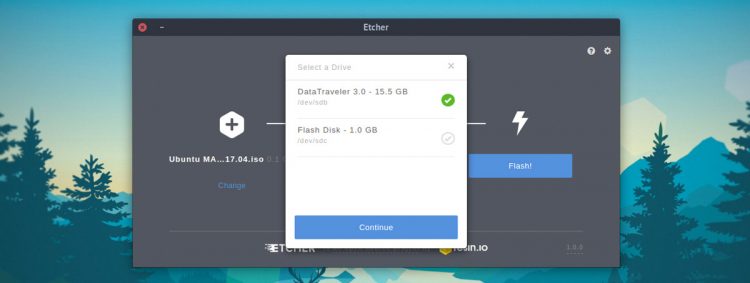
The main interface is simple to understand, and walks you though the three-step process of how to flash an .iso to USB. You open the app, select an image, select a drive (the built in drive picker is designed to avoid you making mistakes and overwriting a hard drive, etc), then hit the Flash button to, well, you know the rest!
A validated burning option is also available. This double-checks the integrity of the image being written to verify that it was successful. While this slows things down, it does mean you’re not left trying to boot from a dud drive.
- Support for creating multi-boot USBs
- Support for persistent storage on Ubuntu images
- Registered Etcher as handler for *.img and *.iso files
For command line fans an Etcher CLI is also available. This allows you to write images and validate flashes from the command line. And because the CLI tool doesn’t rely on the Electron framework it’s a smaller download and install size.
How to Install Etcher on Ubuntu
Etcher is free, open source software and is available to download for Windows, macOS and Linux from the Etcher.io website and from the Etcher GitHub releases page linked below:
Etcher’s Linux builds are available in various formats, but the AppImage package one especially popular.
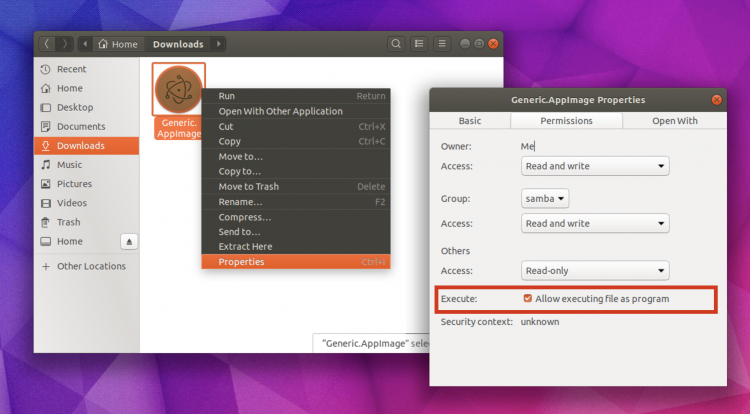
What are AppImages? AppImages are self-contained runtimes that do not require ‘proper’ installation or root access. They do need to be given permission to run though:
Because AppImages run on any Linux distro out there you only need to download it, give it permissions (see here) then double-click on it to run — simple!
If you prefer to install software in a traditional way (i.e. using apt) you can also install Etcher on Ubuntu from a repository.
I won’t lie; getting the repo set-up is a more involved than using the AppImage mentioned above, but it does ensure you get future Etcher updates automatically via Ubuntu’s built-in Software Updater tool.
To add the Etcher repo you need to open the Software & Updates app:
Select the ‘Other Software’ tab in Software & Updates [1]
Click ‘Add’ [2] and paste the following the entry field of the box that appears:
deb https://deb.etcher.io stable etcher
Click ‘Add Source’ [3] to confirm the change, then close Software & Updates. You’ll likely be prompted to update your software sources.
I did say it was pretty involved! If you’d rather save to, you can add the repo from the terminal. To do this run:
echo "deb https://deb.etcher.io stable etcher" | sudo tee /etc/apt/sources.list.d/balena-etcher.list
Whichever way you add the repo the next step is important: you must add the repository key.
Why?
Because it allows Ubuntu to verify that packages installed from the repository are made by who they say they are. You have to add this key to be able to install Etcher as Ubuntu disables unsigned repos by default.
To add the repository key open a Terminal window and paste the following command:
sudo apt-key adv --keyserver keyserver.ubuntu.com --recv-keys 379CE192D401AB61
Finally, update your packages list and proceed to install Etcher:
sudo apt update && sudo apt install balena-etcher-electron
That’s it; launch Etcher from the Applications grid (or your favourite Linux app launcher) and follow the on-screen instructions to create a bootable USB!


