I work out of a coffee shop most days.
It’s a really nice place, full of great people, and an awesomely informal atmosphere. I know I can leave my laptop unattended while I go to fetch another soya latte and it’ll be there when I get back.
Even so, I always lock my laptop before I go grab another drink, if only to stop anyone posting something to my social media!
The “issue” — and I must stress that this isn’t actually a massive issue, but this is a problem>solution article — is that I need to enter my user password to unlock my laptop when I come back, coffee in hand.
My choice of password is a novel. It requires various feats of finger-flexing aerobics to enter correctly. I always fudge typing it, having to retry again.
When I had a Chromebook I took full advantage of ‘Easy Unlock’, a feature that allowed me to ‘unlock’ my Chromebook just by having my Android phone next to it.
I wondered if there was a similar app or tool for Linux.
‘BlueProximity lets you quickly lock and unlock your Linux laptop or PC using a Bluetooth device, like a smartphone or tablet’
Four words into Google later and I found just the ticket — and one hell of a headache.
BlueProximity
BlueProximity is an app that lets you quickly lock and unlock your Linux laptop or PC using a Bluetooth device, like a smartphone or tablet.
You set a device, the proximity at which to lock/unlock, and carry on as normal.
When your phone goes out of range of your laptop or PC for a configurable amount of time your session locks. When you’re back within range it unlocks.
All seamless. All automatic. No need to enter a password or wiggle a cursor.
Is it security prudent? Heck no! But security isn’t the selling point here. It’s all about convenience.
Consider this app a curio, an interesting thing to play around with, rather than a viable, predictable or (even) sensible unlocking mechanism.
The rub
BlueProximity is an old, old app. So old that Ubuntu’s choice of lock screen tech — *waves at Unity Greeter* — has fast superseded it. This means BlueProximity does not work with the Unity desktop.
It does, however, work just dandy with Ubuntu GNOME, which is what I have used to test the app as described in the rest of this guide.
Using it with other Linux distributions, flavours, desktops may vary.
Install & Configure BlueProximity on Ubuntu 16.04 LTS
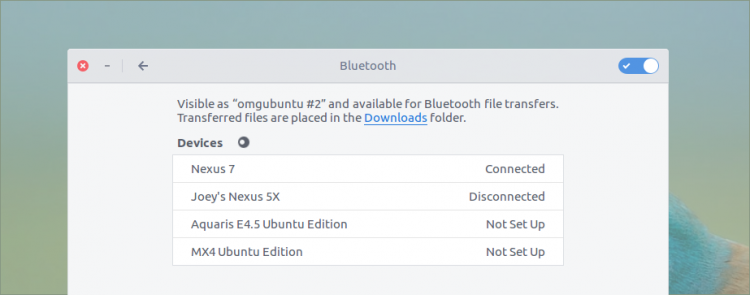
The first thing you need to do before installing any additional apps is to pair your phone or tablet with your Ubuntu laptop or PC.
You don’t need anything special here, just remember to make sure that your phone/tablet is visible before you try connecting to it. It is crazy how many people forget to do this step!
Open up GNOME Control Center, head to Bluetooth, and click on the name of the device you want to use. Follow the on-screen prompts for the rest.
The next step is to install the BlueProximity app.
Thankfully this is easy; the app is available to install from the Ubuntu repos in both Ubuntu 14.04 and Ubuntu 16.04 LTS. To fetch it via the command line run:
sudo apt-get install blueproximityThat’s it. You’re done.
Only joking.
Now comes the headache-inducing section.
Because BleuProximity is an old app its system tray applet is no longer supported by modern desktop environments. You can get it to show up, however, by using a third-party patch.
Whilst you can skip this, if you do you won’t be able to reconfigure the app using the GUI without deleting your entire config file and starting over. And that’s even more hassle.
If you’d rather have access to the BlueProximity indicator (and I think you would) you need to run the following commands in a new terminal.
The first command grabs the indicator patch…
wget http://sourceforge.net/p/blueproximity/patches/_discuss/thread/3d5eb592/7e50/attachment/proximity.patch
…And the second applies it to BlueProximity:
sudo patch /usr/share/blueproximity/proximity.py < proximity.patch
With your smartphone or tablet already paired with your GNOME desktop you can go ahead and launch BlueProximity from the GNOME Activities Overlay.
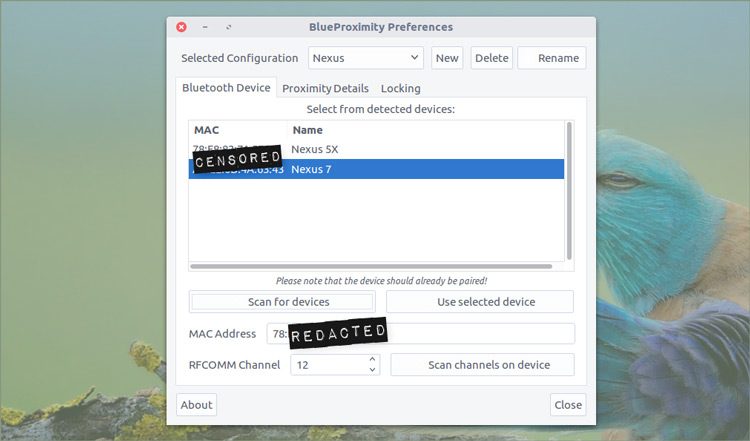
You’ll see a tray item appear (in the lower left if you’re not using the Top Icons extensions) and, the first time you run it, a configuration window will open:
Here’s where things start to get a little YMMV.
First: click the ‘Scan for Devices’ button.
This should (hopefully) list connected Bluetooth devices. Select your smartphone/tablet and click ‘Use selected device’. This will auto-fill the MAC address box with the device’s pertinent info.
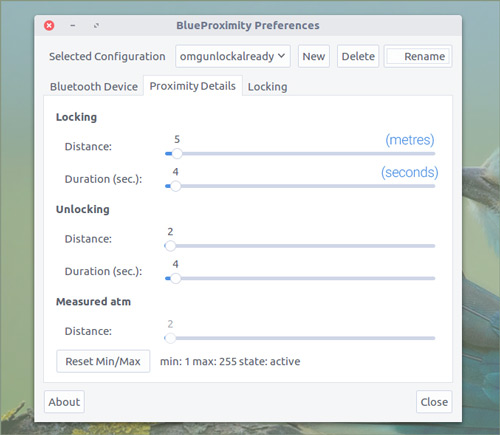
Next, head into the next tab titled “Proximity Details”.
Here is where you set up how close your device has to be in (or out) of range to trigger the lock screen.
- The distance (within which the app will trigger an action) is in metres.
- The duration (the time in which the app monitors the range) in seconds.
‘Measured atm’ lets you see a live, auto-updating gauge on how close your configured device currently is (again in metres). If this line is maxed out at 255 it means something has gone wrong and you need to skim back a few steps and reconnect.
It should go without saying (but I’ll say it anyway) that the “locking distance’ must be greater than the unlocking distance.
As I work from a coffee shop I chose something nice and intimate: a radius of 5 metres (when my device goes past this my computer locks). To unlock I simply need to move my device to within 2 metres of my laptop.
When set, close the preferences window entirely and test it out by taking your authorised device and moving beyond your set distance for the set duration.
The screen will lock.
Now move back towards your device, again making sure that you’re within the correct distance for the correct duration, et voila: the screen will unlock.
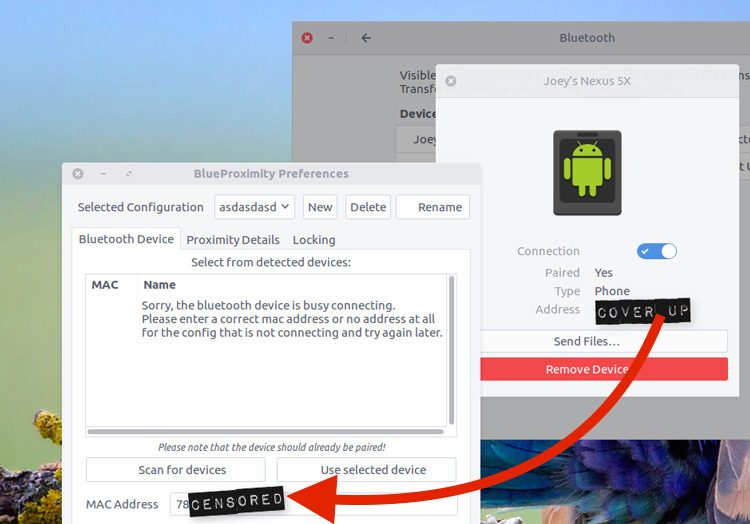
‘Sorry, the bluetooth device is busy connecting…’ Error
If you also see an error reading ‘Sorry, the bluetooth device is busy connecting…‘ don’t fret: you can still set things up. You have to go the long way around and manually enter the MAC address of the device and find an active/open RFCOMM Channel.
That’s all there is to it.
A few notes:
- You can pause proximity locking from the system tray applet, though its icon makes it hard to tell the state
- BlueProximity needs to be running for the feature to work, so remember to open it before you walk away
- If you phone’s battery dies while the screen is locked you’re stuffed…
- …Only kidding. You can always log in using your password.
Further Reading
Refer to the Blueproximity manual for more detailed instructions, and be sure to share your own experiences — and frustrations — in trying to get it to play nice with modern Linux distributions.
It’d be so much easier if this feature was built into GNOME or Unity!

