Below is our list of things to do after installing Ubuntu 18.10 ‘Cosmic Cuttlefish’.
Covering the latest stable release, our list of ‘things’ to do after installing Ubuntu 18.10 is chock-full of handy tips and helpful pointers, all of which can help you to get more from your fresh Ubuntu install.
Nothing below is compulsory. Feel free to pick and choose the steps that apply to you. We also encourage you to extend our list in the comments section by sharing your own suggestions!
Finally, if you find this post helpful, please do share it on Twitter, Facebook or anywhere else you fancy!
18 Things To Do After Installing Ubuntu 18.10
1. Learn About Ubuntu 18.10
Spoiler: Ubuntu 18.10 isn’t hugely different to the Ubuntu 18.04 LTS release. If you’ve used it you’ll be familiar with the way Cosmic looks and the way it runs. Major changes are few and far between, and the standard Ubuntu desktop layout retained.
That said Ubuntu 18.10 does feature a number of performance patches that make the overall UI more responsive. This, as well as a bevy of minor improvements, mean there’s plenty of reason to upgrade.
Get up to speed by watching the video above. We put together especially for you! It whizzes you through what’s new in Ubuntu 18.10 with no fluff and no padding.
2. Install Updates

If you install Ubuntu 18.10 on release day you can skip this step, but everyone else needs to check for security updates and bug fixes, and install any that are listed as available.
It’s easy enough to check for updates on Ubuntu. Just launch the Software Update tool from the applications grid (it has a beige icon with an “A” on it). The app will automatically scan for updates after you open it.
3. Enable Media Codecs
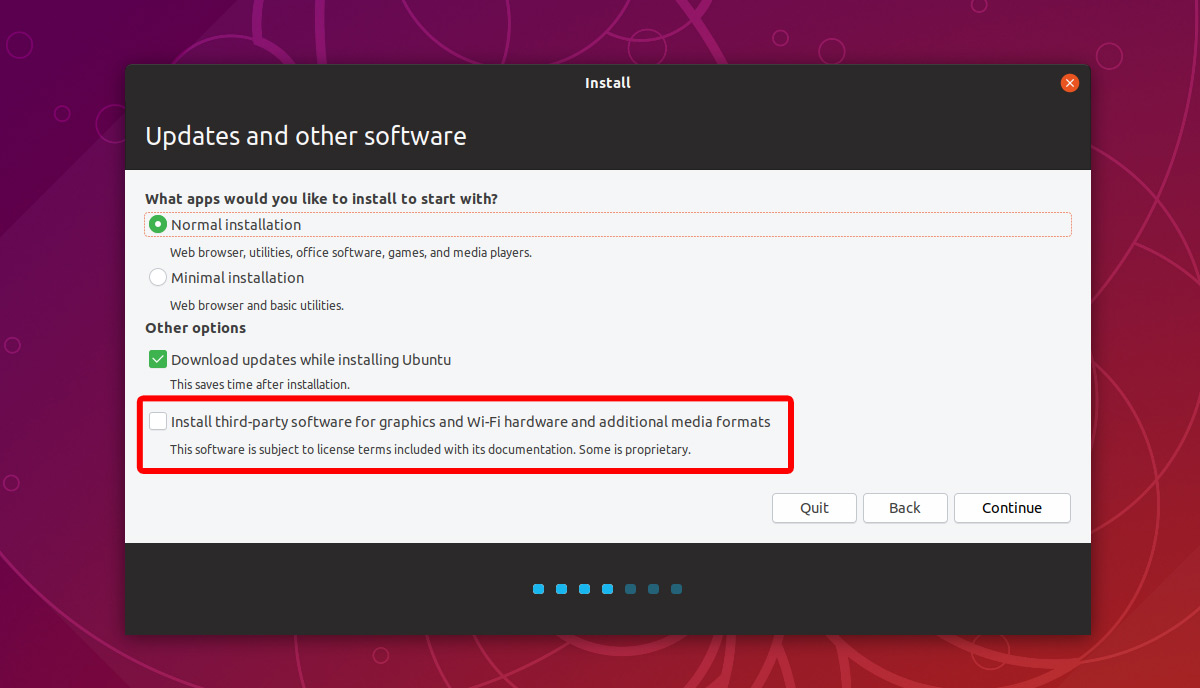
Ubuntu offers to install third-party codecs and restricted extras (like the Adobe Flash plugin) during install, but it’s often easy to overlook the option as it’s not checked by default.
You need to install media codecs</strong to play MP3 files, watch certain types of online video, and take advantage of improved graphics card support on Ubuntu.
The good news it that it’s deliciously easy to install the required codecs and packages. Click this button below to begin:
4. Enable Ubuntu Dock Minimize on Click
On the left of the Ubuntu desktop sits the Ubuntu Dock. This iconified task bar makes it easy to open, manage and switch between running apps and apps that are ‘pinned’.
But it’s not perfect.
See, I like applications to minimize to their Dock icon when clicking them, but the Ubuntu Dock has this feature turned off and the setting to turn it on is hidden.
If you want to enable minimize on click for the Ubuntu Dock run the following command in the ‘Terminal’ app (which you can open by pressing Super + T):
gsettings set org.gnome.shell.extensions.dash-to-dock click-action 'minimize'
Now, each time you click on the icon of a running app it will minimize to its icon or, if already minimized, restore itself back.
Bonus: You can also move the Ubuntu dock to the bottom of the screen if you’d like. Just open Settings > Dock and select the desired screen position from the drop-down menu. As with the minimising effect the change will take effect instantly.
5. Opt-in to system reports
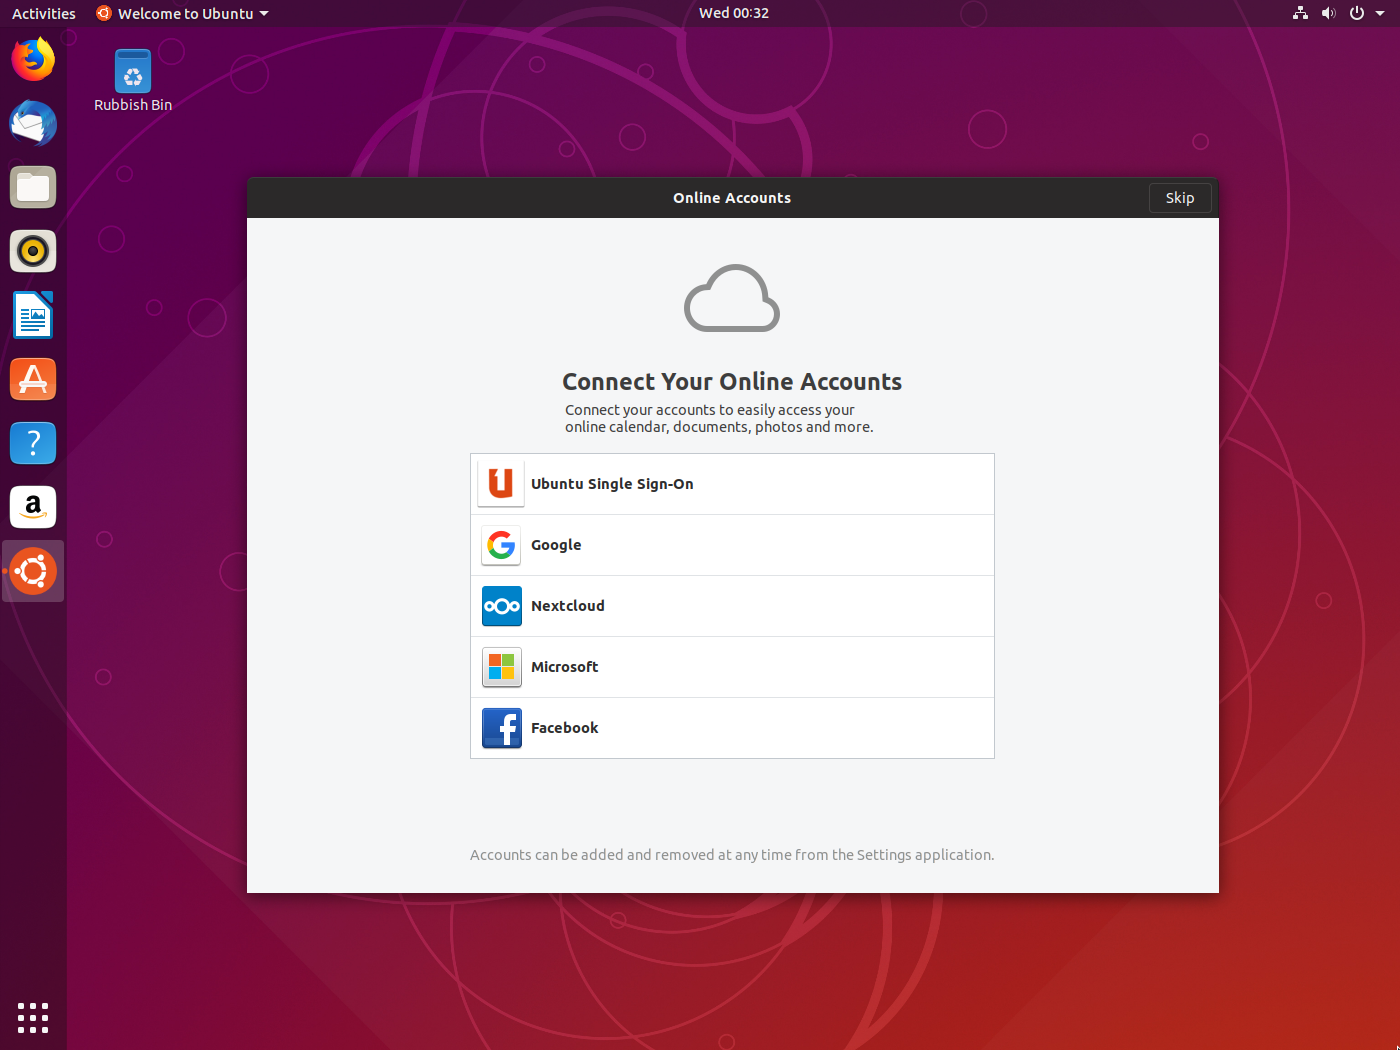
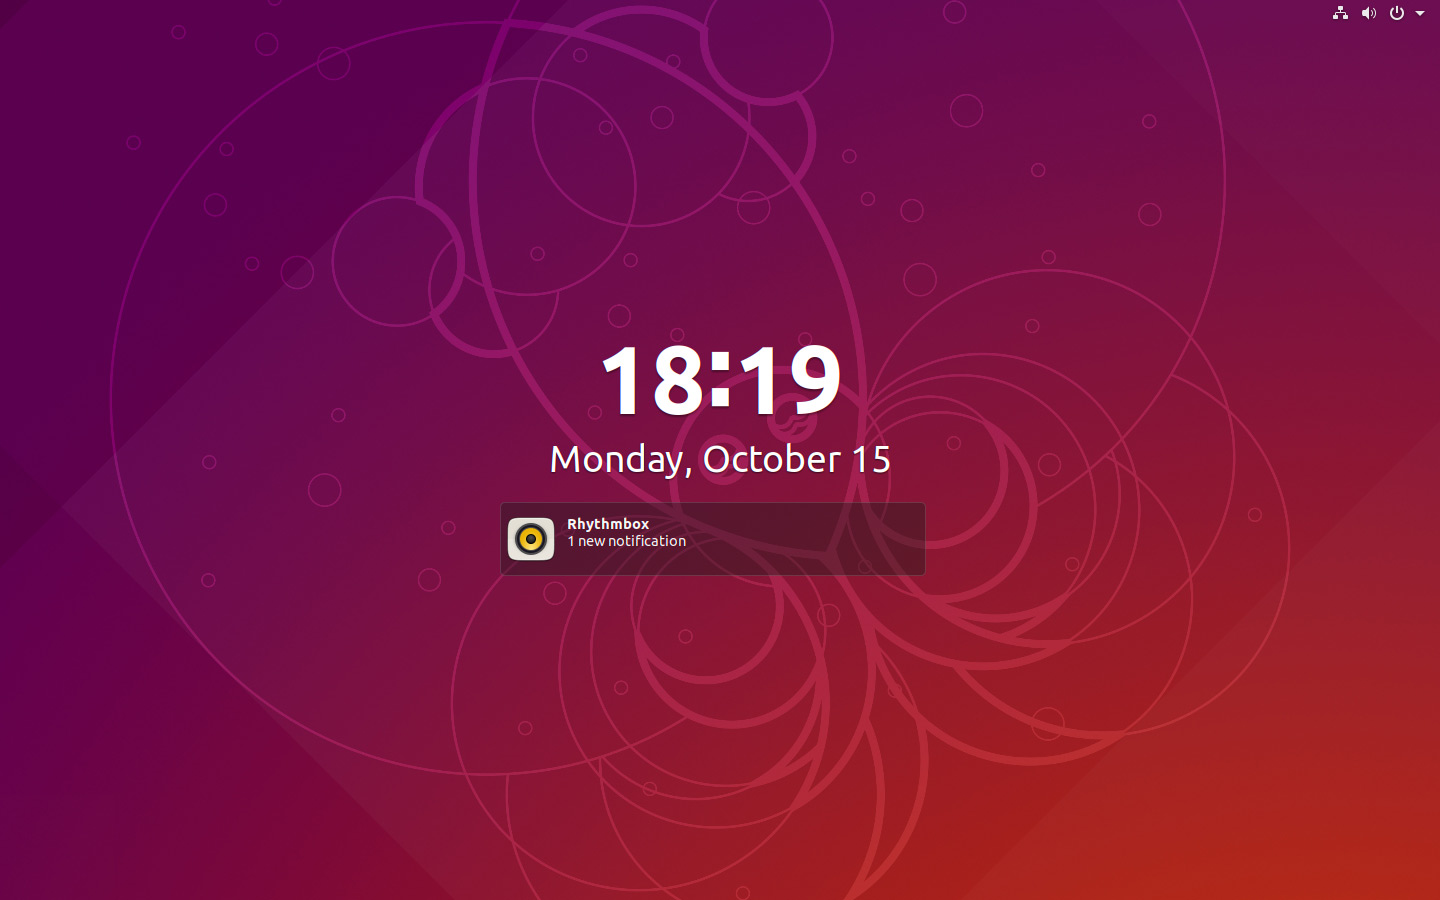
The first time you login to Ubuntu 18.10 you will be greeted by the Ubuntu initial set-up app.
This tool will offer to help you set-up your online accounts, standard, and then ask if you want to enable system reporting:

While this sounds scary, it isn’t. In fact, we looked at what data Ubuntu Report collects about your system and, spoiler, it’s all fairly mundane — useful mundane!
Choosing to send details about your system’s set-up to Canonical helps Ubuntu developers learn more about the sort of hardware and devices that we’re all using. And if they know what we’re all using, they’ll know what parts of the system to invest resources and manpower in.
By enabling Ubuntu Report you can help Ubuntu help everyone!
6. Slim Down Firefox
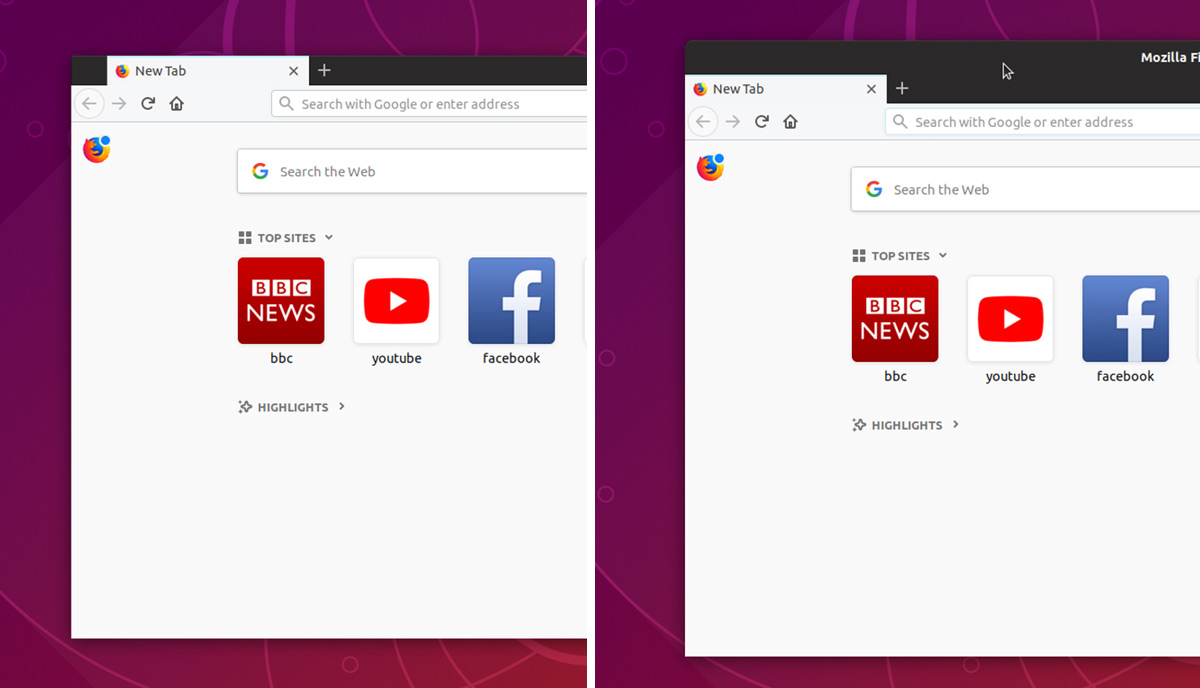
Firefox is Ubuntu’s default web browser — and rightly so! This open source, fast, and standards compliant browser works great and looks great too.
But I find the browser looks a little “large” compared to other apps I use. Firefox uses a traditional window title bar by default. This makes the browser easy to move, but substantially increases the overall room the browser’s “window chrome” takes up.
Thankfully, Firefox hides a compact, streamlined look in its settings.
Head to Customise and uncheck the ‘Title Bar’ box at the very bottom of the settings page. The browser will instantly snap into its new, neater look, and you’ll have more room on your screen!
7. Learn Useful Ubuntu Keyboard Shortcuts
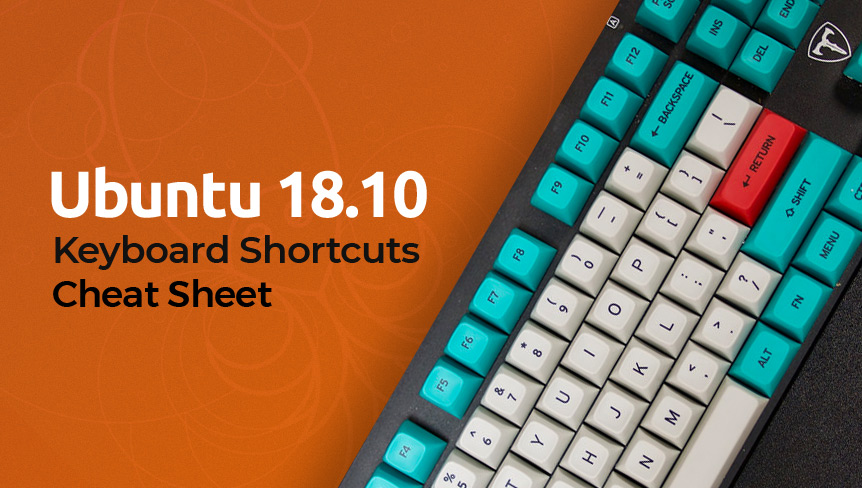
There are 100s of Ubuntu keyboard shortcuts available, ranging from GNOME Shell shortcuts (tap the windows key to open the apps drawer); Nautilus shortcuts (e.g, Ctrl + T opens a new tab); Ubuntu Dock shortcuts (Super + 1-9); and more.
Since some keyboard shortcuts are more useful to know than others (not to mention there are a few that are difficult to remember) we’ve compiled a list of the most useful keyboard shortcuts for Ubuntu 18.10 in the following graphic.
Feel free to download it learn from it, and pass it on!
Bonus: You can discover keyboard shortcuts in Linux apps by holding down the Shift and the ‘?’ keys. This will display a list of keyboard shortcuts on the Ubuntu desktop in a modal window.
8. Unlock Hidden Settings
If you only do one thing on this list, make it this one because the one app I highly recommend all users install after installing Ubuntu 18.10 is ‘Tweaks’.
A swiss-army knife for Ubuntu: Tweaks is a tool no user should do without
Tweaks, as the name might suggest, will unlock hidden settings, thereby giving you more control over how Ubuntu and the GNOME Shell desktop behave.
The utility offers a much wider array of settings than the ones you’ll find listed in the standard Settings app, including options to:
- Change GTK & icon theme
- Move window buttons to the left
- Change desktop font + size
- Center new windows
- Tile windows when dragged to screen edge
- Show the current weekday in the top bar clock
A veritable swiss-army knife for Ubuntu, Tweaks is a tool no user should do without — so go install it from Ubuntu Software right now!
9. Change scroll direction in Ubuntu

If you’re using a laptop to a trackpad I probably don’t need to mention that Ubuntu’s default scroll direction feels totally unnatural, despite being called “natural scrolling”.
If you’re not a fan of it, and you want two-finger scrolling to scroll vertically in the opposite way, you can adjust the setting without much fuss.
Head to Settings > Devices > Mouse & Touchpad and set the “Natural Scrolling” setting to off.
A simple tweak for a saner scroll experience!
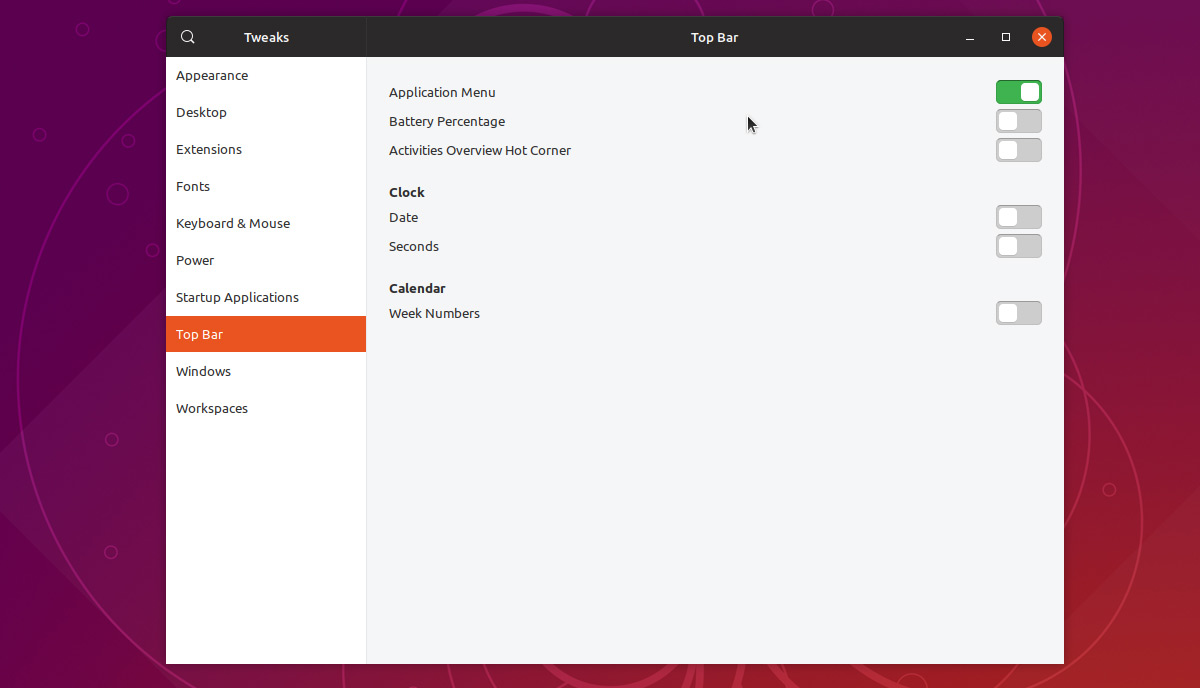
10. Show Battery Percentage

On the topic of laptops, people often get in touch to ask how show battery percentage in Ubuntu 18.10‘s top bar.
By default Ubuntu displays a small battery icon in the top bar. This keeps you informed about how much battery power your device has left — but although the battery icon is easy to understand it’s also terrifically tiny.
You can get the top bar to display battery percentage as a text reading, thereby giving more of a quantifiable handle on how much battery power is remaining.
To show battery percentage on Ubuntu open the Tweaks app (see step #7) and go to Top Bar > Battery Percentage.
Alternatively, if you’re a fan of the command line, you can run this command:
gsettings set org.gnome.desktop.interface show-battery-percentage true
To undo the setting run the same command again, but replace ‘true’ with ‘false’. Changes apply instantly.
11. Choose How Fast Ubuntu Locks
In the Power section of Settings you can choose the length of time your Ubuntu machine is idle before the screen lock kicks in.
Remember: the sooner your screen locks the safer it is. It’s convenient to set a longer lock time but it is also (potentially) less secure.
To change the Ubuntu lock screen timeout go to Settings > Privacy > Screen Lock and adjust the “Lock screen after blank for…” setting.
12. Set-up Night Light
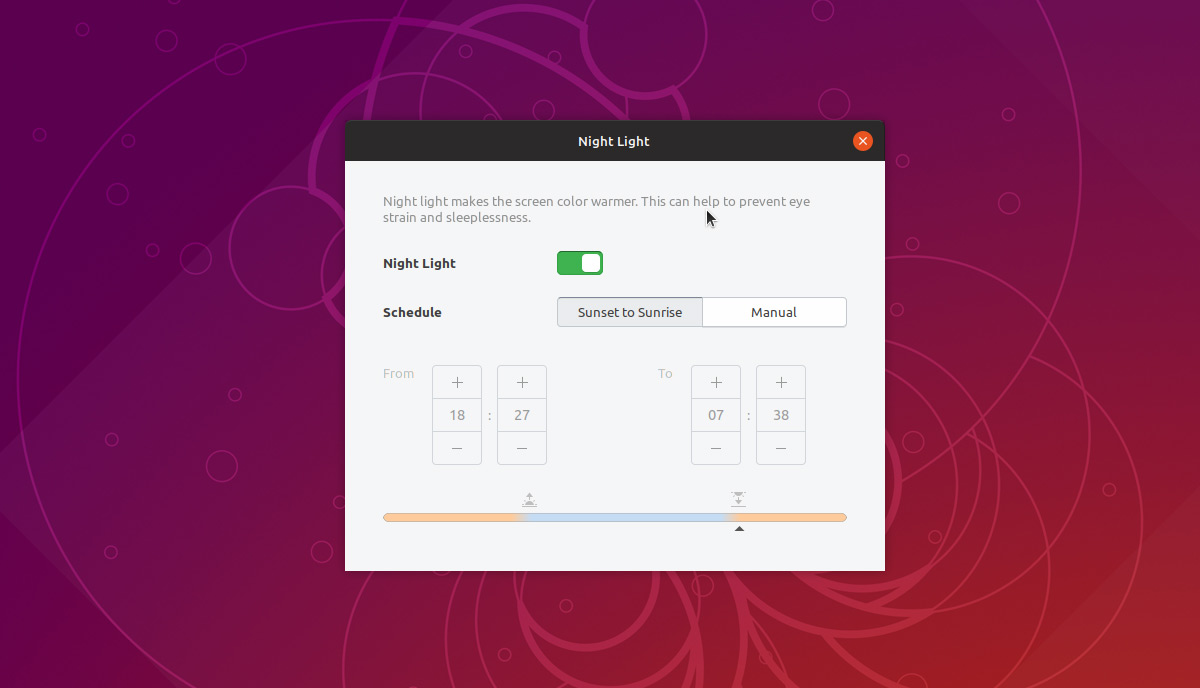
Gawking at a computer screen all day is not great for your eyes or, it turns out, your sleep. Blue light is a terrible disruptor of our internal body clock, making it harder to get a good night’s sleep.
Use Ubuntu’s built-in ‘Night Light’ feature and the color of your display will appear warmer in the evenings as the amount of sleep-meddling blue light is reduced.
To enable Night Light on Ubuntu head to Settings > Devices > Displays and check the box next to “Night Light”. You can control the feature (when active) from the Status menu.
You can make Night Light turn on automatically between sunset to sunrise, or set up a custom schedule to match your sleep patterns.
13. Get GNOME Extensions
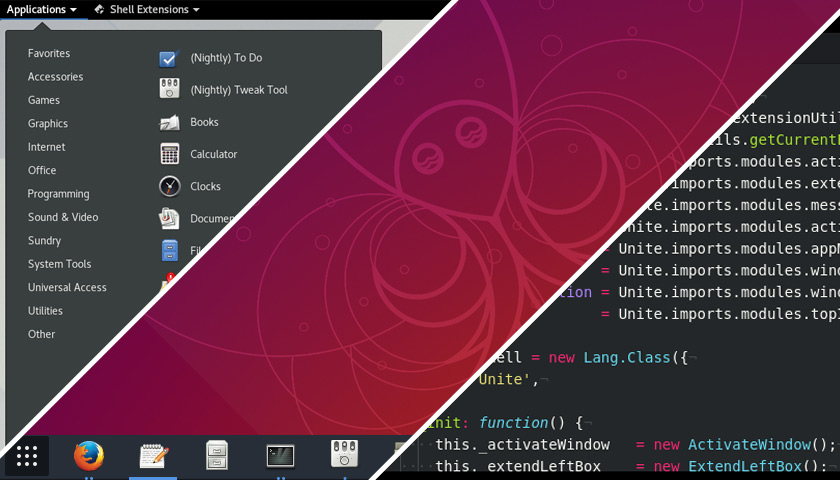
GNOME Extensions are a great way to add more functionality to the Ubuntu desktop without having to install apps or touch hidden settings.
Whether you want a single-panel desktop like Windows 10 and Linux Mint, a slick coverflow alt+tab switcher, or a drop down terminal, chances are there’s an extension that can do it.
Hundreds of little power-ups are available through GNOME Extensions website and you can install GNOME Extensions on Ubuntu 18.10 desktop by using your web browser.
To get started you’ll need to install:
- Web-browser add-on (Chrome here; Firefox here)
- chrome-gnome-shell host connector (this works with Firefox)
The GNOME Extensions website will prompt you to install the browser add-on when you visit, or you can use the links provided above.
The host connector (the bit that lets the website communication with your desktop shell) is available to install from Ubuntu Software:
When both parts are installed you’re all set. Install add-ons from the GNOME Extensions website using the ‘off’ to ‘on’ toggle shown on extension pages.
14. Install the Best Open Source Software
When you want more apps — and let’s face it: who doesn’t? — Ubuntu Software is the place to go.
A centralised, convenient, and efficient hub, Ubuntu Software helps you quickly find and install extra apps, utilities and other software on your system.
And honestly, you’re spoilt for choice as thousands of fantastic apps are available to install from Ubuntu Software, including the best open source software has to offer.
There are professional image editing tools like GIMP and Krita, easy-to-use video editors like OpenShot and Kdenlive, and famous open source software like VLC, Blender, and more.
Dive in and explore!
15. Look Out For Firmware Updates
The Ubuntu Software app is able to do more than help discover new software. It can also install firmware updates on compatible hardware devices, such as graphics tablets and keyboards, which are connected to your machine.
Ubuntu Software will notify you if or when any firmware updates are available for your devices. You’ll be able to “flash” these updates to your devices from within the app itself, no fuss.
For more details on the LVFS and firmware updates on Linux systems check out the project website:
16. Stock up on Snap Apps
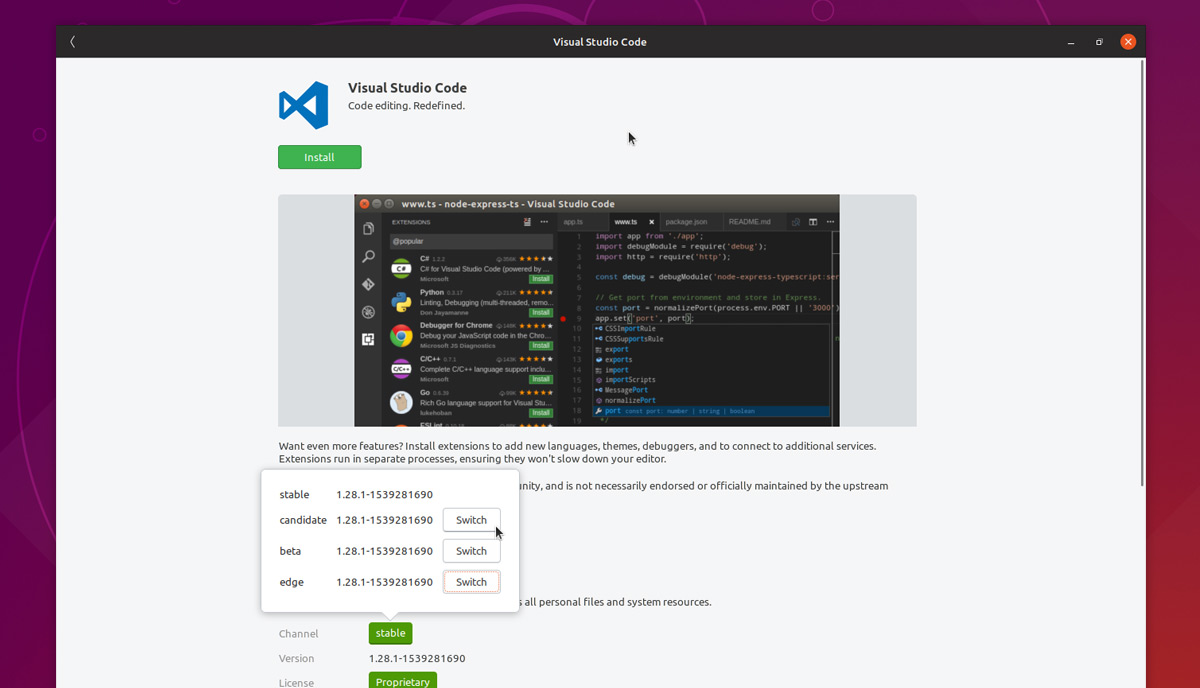
Snappy is a new way for app developers to get their software to Linux users like you and I, regardless of which Linux distro we happen to run.
Snaps offer a safe way to run the latest version of popular apps without having to rely on third-party PPAs or obscure repos copy+pasted from a 3 year old forum thread somewhere.
You can browser all the apps available on the official Snap Store in your browser, or pop open Ubuntu Software and have a sift about.
A swathe of well-known software is stocked on the Snapcraft shelves, including:
- Spotify – music streaming service
- Skype – video calling client
- Hiri – desktop email client
- Slack – team messaging client
- VLC – the media player that needs no introduction
- Discord – voice and text chat for gamers
To stay on top of notable new Snap app releases you may want to regularly check in with our Snap apps tag. It is, after all, why we have one 😉.
17. Clear apt cache to free up space
If you install lots of software and package updates often you should, from time to time, ensure your system is kept clean.
As listed in our article on how to free up space in Ubuntu you can check how big your APT cache is by running this command:
sudo du -sh /var/cache/apt/archives
If it’s particularly large (and it often is) run the following command to clean the apt cache and free up disk space:
sudo apt clean
18. Bookmark Us!

Oh, c’mon: you didn’t expect us to compile a list like this and not use the opportunity to sell ourselves? 😅
Whether you’re new to Ubuntu or not, I like to think we do a pretty good job of keeping you bang up-to-date on the latest Ubuntu news as and when it happens, wherever it happens!
We regularly showcase new apps, share tutorials, tips & tricks, and inform you of any important community updates, any new Linux kernel features, and loads more.
We’d be honoured to earn a spot in your bookmarks folder, and delighted if you decide to follow us on Twitter, Instagram, YouTube or subscribe to our RSS feed.
You’ll get:
- The latest Ubuntu news
- Discover new Linux apps
- Keep track of major updates
- Learn useful tips & tricks
- Make your voice heard in polls
- …And more!
Don’t forget that we also keep tabs on a world of Ubuntu-based distros, including Linux Mint, elementaryOS, and Zorin OS. That’s in addition to the growing catalogue of official community spins like Ubuntu MATE and Ubuntu Budgie (whose latest releases are well worth checking out).
Over to you
You’ve just read what we like to do after installing Ubuntu 18.10, but what about you? Do you have your own post-install checklist? How do you like to tailor a fresh install to suit your needs? Let us (and everyone else) know in the comments below!