


F3 (Fight Flash Fraud) is an open-source tool to check if a USB drive or SD card has the capacity it claims on the label. If you’ve used h2testw on Windows, this does the same thing on Linux.
Memory card and USB drive prices have more than doubled this year, and that makes cheaper listings more tempting. But buying low-cost storage has always carried a risk of fakes (not to mention low-quality or slow chips).
Dodgy brands and marketplace sellers often sell drives whose capacity is below what the labels says. Your computer falls for this trickery – it’s done in the storage device’s controller – and will happily report it has, say, 512GB, even if it’s really 32GB.
You only find out it’s fake when a file you thought you’d saved won’t open. Because most of these fake drives carry on accepting files even when it has nowhere to put them (it bins off what it can’t hold or writes over data it does hold), you won’t notice during transfer.
A Windows developer, peeved with countless counterfeit capacities, created h2testw in 2008 to help others detect the phoney flash.
F3 is a Linux app that implements h2testw’s algorithm (h2testw for Linux, if you will, albeit lacking a GUI).
While it lacks a GUI frontend, it’s simple to use from your terminal.
Install F3 on Ubuntu
F3 can be installed with one command on Ubuntu (and Linux Mint, Zorin OS, et al):
sudo apt install f3
As F3 is a set of command line utilities, not a desktop app with a GUI, you won’t find a shortcut for it in the application launcher.
F3 gives you two ways to check a drive.
You can use f3write and f3read in sequence, the first will fill your drive’s remaining free space with test files and the second verifies that all the data that should be there, is. This method is a bit slower overall, and may increase write wear.
Working a bit faster is f3probe. This tests the drive directly, writing data in a different way to tell you if the capacity the controller reports is legit. This tool is more useful on larger storage devices (it can take a while to write 256 1GB files).
Regardless of which tool you try, if you are testing a device with contents you can’t afford to lose, copy off anything you want to keep before you begin – don’t just nod at me and mouth “sure”; do it just in case.
Run a quick check with f3probe
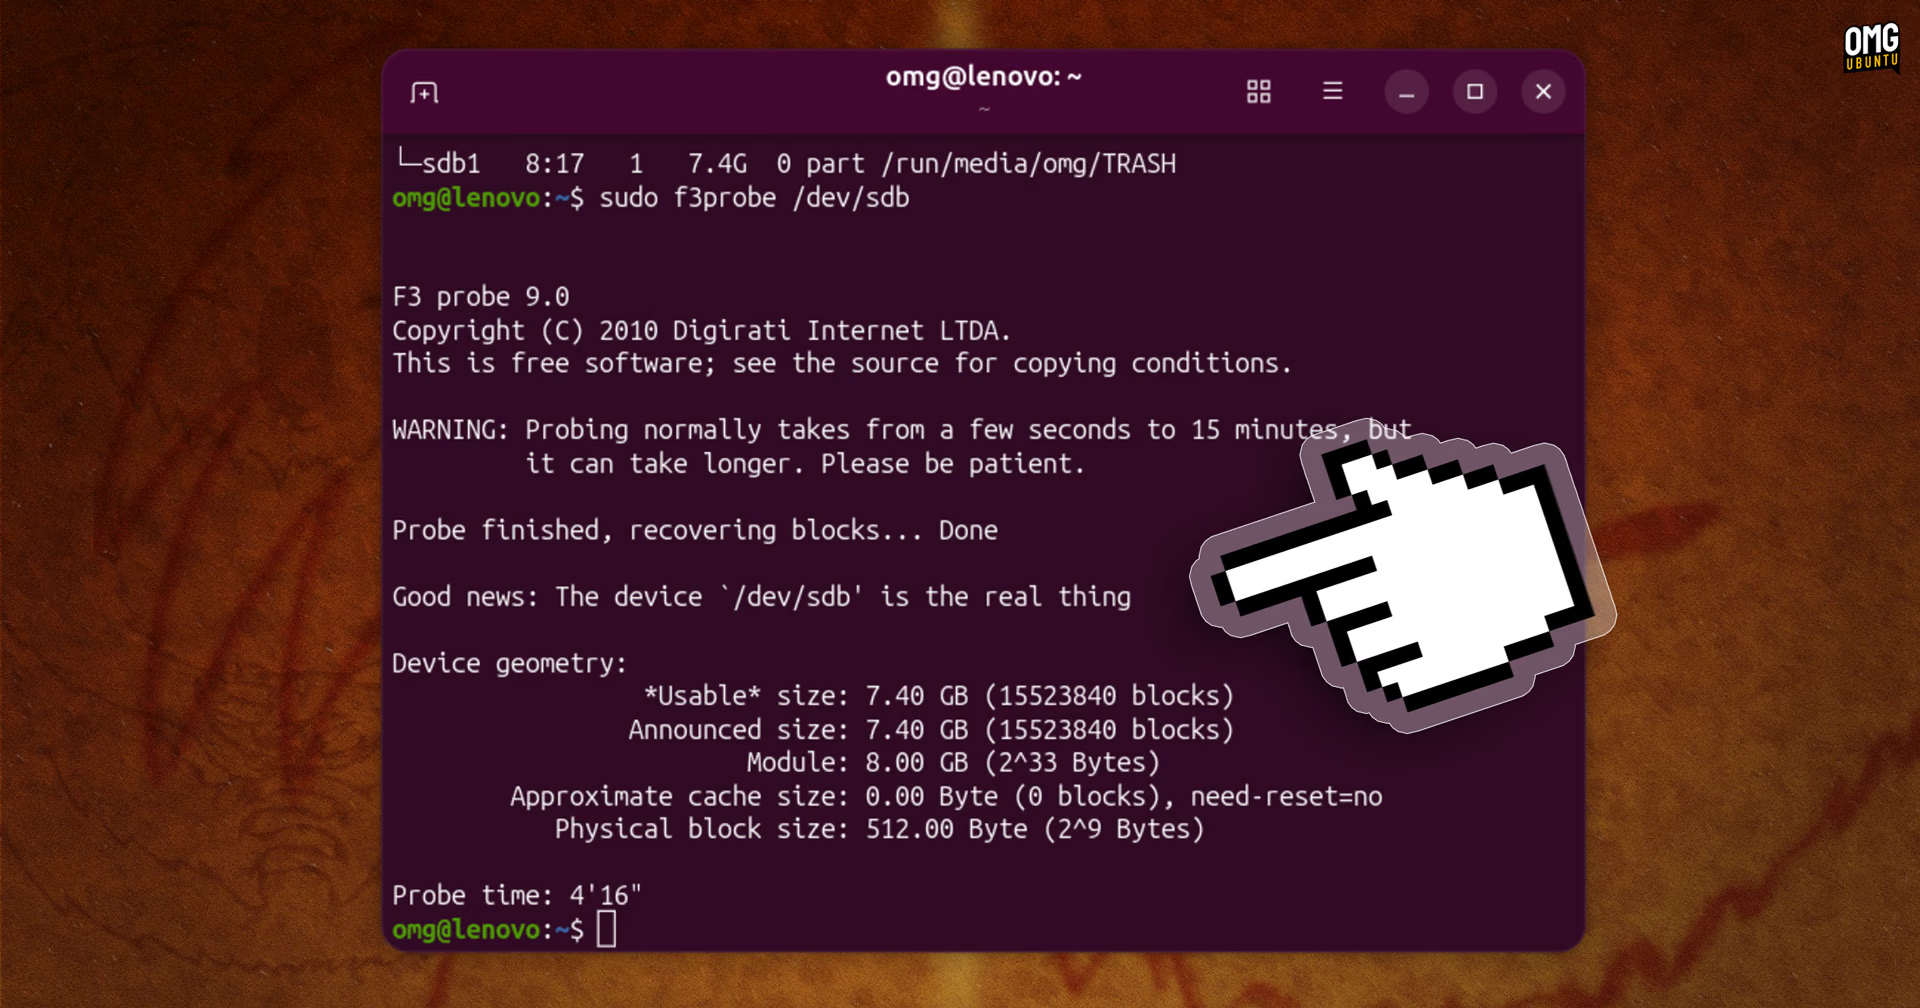
Plug your device in and make a note of its drive path via lsblk.
When using f3probe you need to pass it the full device path, not a partition mount, e.g., you’d give it /dev/sdb rather than /dev/sdb1 or /dev/sdb2.
sudo f3probe /dev/xyz
The process or checking can take up to 15 minutes depending on the memory’s write speeds, but in most cases it should be fairly brisk. Leave it to do its thing and, once it’s done…
If your device is all it should be, f3probe confirms this in the terminal with a “good news” string:
Good news: The device `/dev/xyz' is the real thing
If not, you’ll see a string that says:
Bad news: The device `/dev/xyz' is a counterfeit of type limbo
The counterfeit output will also show a command you can run to “fix” the drive, which creates a partition for its actual size, no the size the reprogrammed storage controller reports.
Run a fuller check to verify
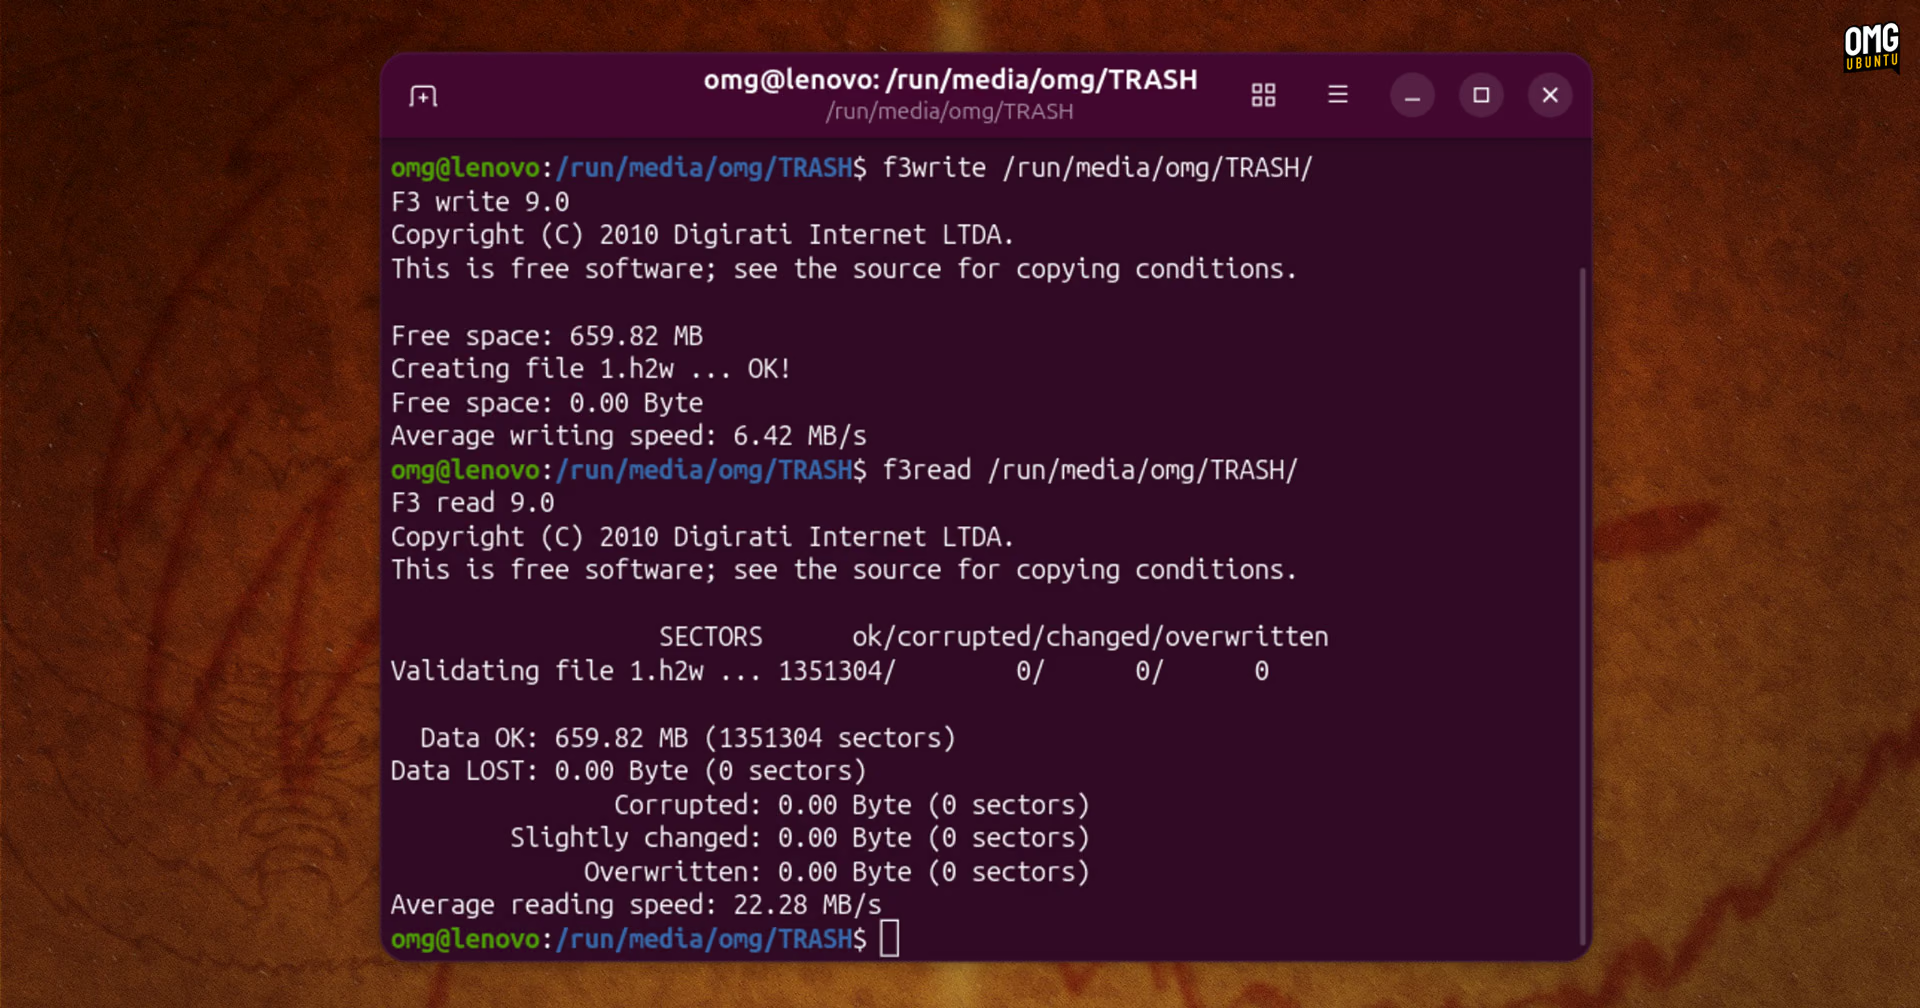
You can use the f3write/f3read tools for a thorough test of your drive’s capacity. This writes to and reads out every available block.
When you use f3write and f3read you need to give it the drive’s mount point (the folder it shows up as in your file manager). This is often something like /media/username/DRIVE, and not the /dev/ path you use for f3probe.
As aways, you can look at the output of lsblk to see this.
Open your terminal and run:
f3write /media/device/
The device’s remaining free space is filled with 1GB files, named something like N.h2w. The CLI shows a progress bar so you know how long it’ll be before it completes. This method can be slower than f3probe on large capacity devices.
Once the writes are done, run f3read on the same mount point:
f3read /media/device/
Now, f3read reads those files back and checks them against what was written. Anything the drive discarded or overwrote to ‘pretend’ it’s larger that it is show up as damaged or corrupted.
Once done, delete the test files off your device to get the space back.
And if the drive is fake?
If you see a different value to the one you’d expect… Well, I hope you kept the receipt or can claim a refund, as you haven’t received what you thought you’d bought.
If you want to keep it, but have it show its real value, you can use the f3fix tool. This creates a partition that’s the size of drive’s true capacity. The command is shown in the output of f3probe when a counterfeit drive is found.
Even so, it would be wise to not rely on a counterfeit card or stick if the capacity is off, as it’s more than likely the quality of the flash chips holding data is iffy too.
Have you ever bought a fake capacity drive? I’m curious to know how widespread the issue is – and if people ever find out…