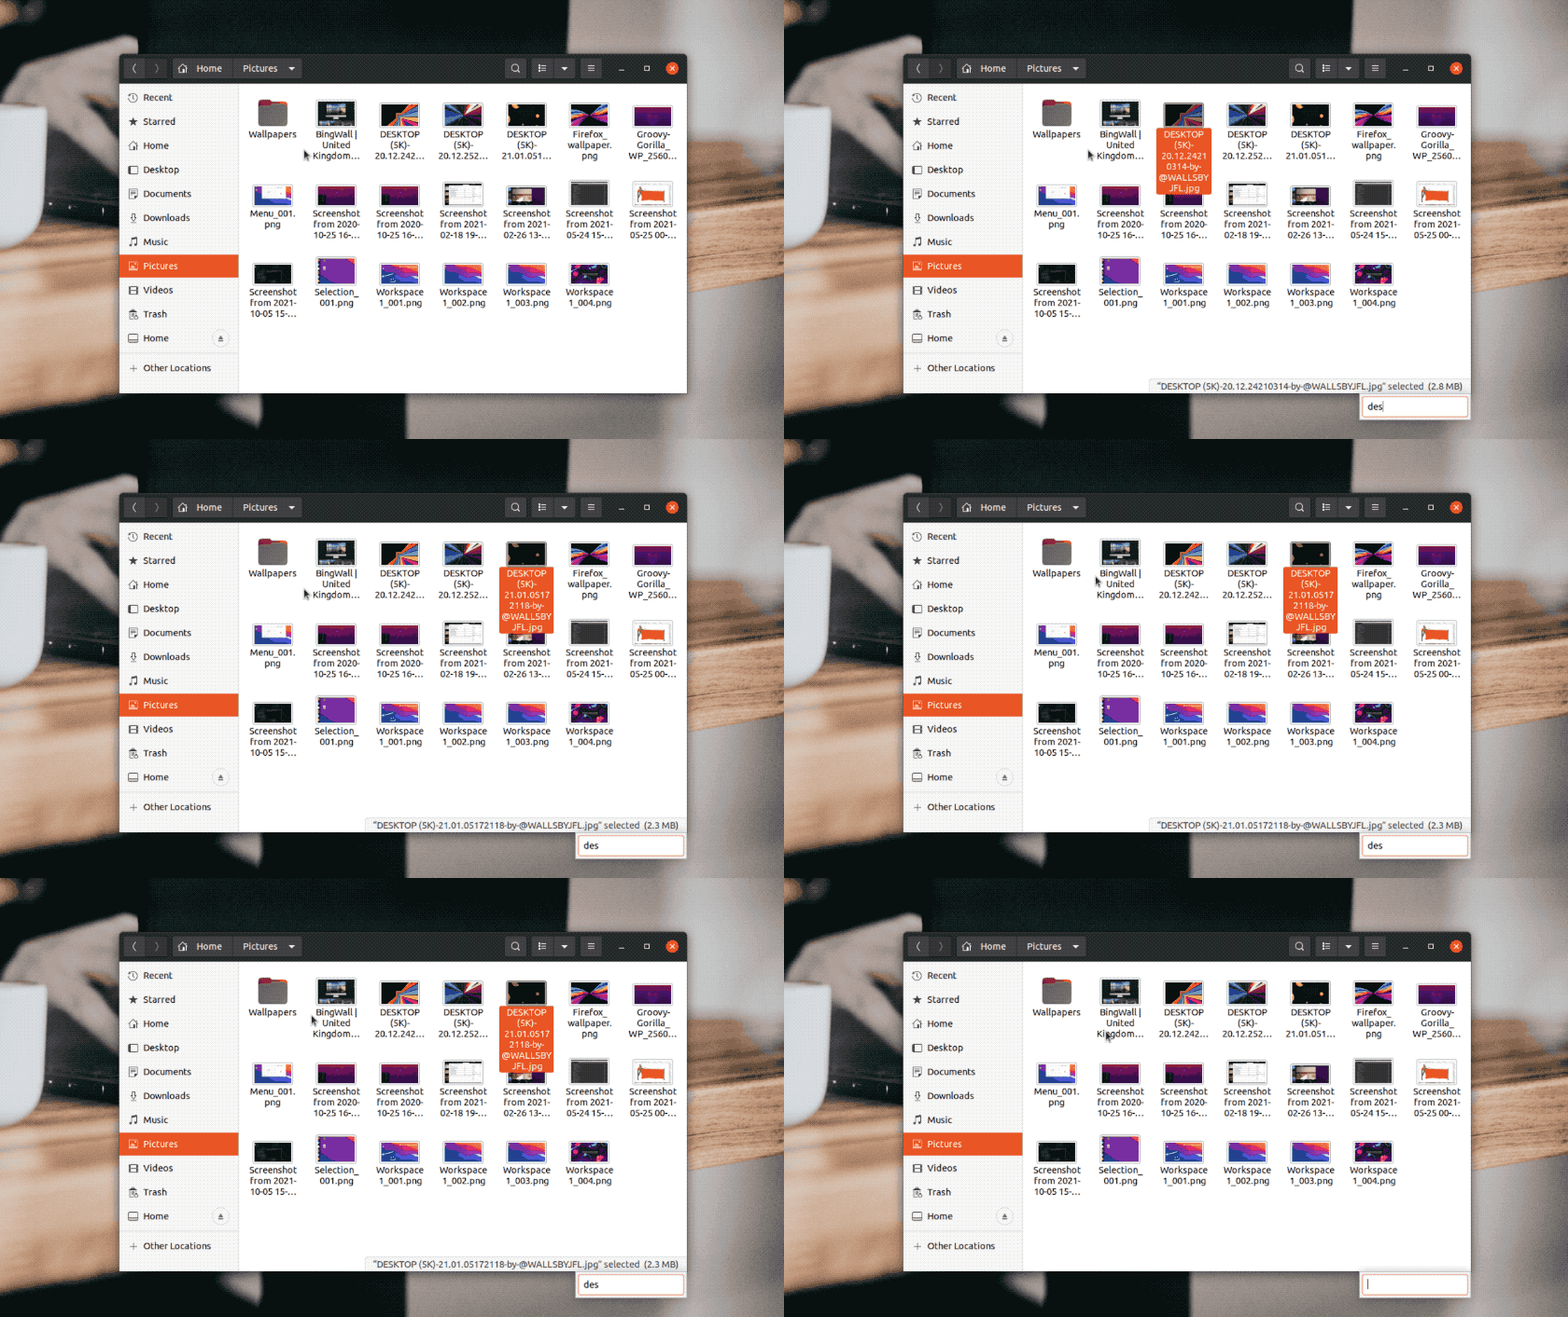
In this guide I show you how to get Nautilus typeahead feature back in Ubuntu.
GNOME developers retired Nautilus’ type ahead functionality back in 2013. Ubuntu continued to patch-in the feature until 2017 when they chose to adopt a more ‘vanilla’ GNOME desktop experience by default.
Chances are you’ve adapted to life without this useful file-finding feature.
But in the world of open source anything is possible. If you have an itch, you can scratch it yourself — and a fan of Nautilus typeahead search has done exactly that.
What is Typeahead Search?
What is typeahead search, how does it differ to the ‘out-of-the-box’ experience, and why do people care about it so much?
Typeahead search in Nautilus works like this: you open a folder and begin typing. As you type, the file manager jumps to/finds the first file (or folder) that matches the letter(s) you pressed, but (crucially) only in the directory you’re currently viewing.
Basically, it finds ahead.
This behaviour is fast, efficient, and intuitive.
For example, I open the Pictures folder and begin typing ‘screenshot‘ on my keyboard. The file manager instantly jumps to the first image that matches. I can then use my keyboard arrow keys to skip to the matching result I want.
In modern versions of Nautilus the file manager initiates a search for all files that match when you press a key, be it in the file name or in the content of a document (this full-text search is powered by the Tracker service).
Don’t get it? It’s a very visual thing, don’t worry. Here’s an ancient video I found on YouTube (note: the actual point of this video is to enable interactive search, and that no longer works) that shows it in action:
Nautilus default search behaviour is better at finding things for most people.
But ‘most people’ isn’t everyone.
Some folks, especially those who made the switch to Ubuntu from macOS, will prefer to hit a letter on their keyboard (with the file manager in focus) to jump to the first file or folder that matches it (without hiding everything else from view) as it’s what they’re used to.
Before I show you how to add typeahead search to using a third-party patched build I will mention that you can make Nautilus’ full-text search work more like type-ahead find by doing this:
- Open Nautilus > Preferences
- Change ‘Search in Subfolders’ setting to ‘Never’
Now the file manager only shows matching files from the directory you’re currently in.
While this sounds like a good idea at first, the moment you need to search for a file in a different location…
So, for the real deal, read on.
Enable Nautilus Typeahead Find in Ubuntu
You can install a patched version of Nautilus with typeahead search restored on Ubuntu 18.04 LTS and above. You don’t need to downgrade your system, nor switch to a different Linux file manager such as Nemo, Caja or Thunar (though that is a good option, for what it’s worth).
A 3rd-party PPA makes it easy to bring this much-missed file-finding feature back, repurposing a package from the Arch User repo. This PPA replaces the stock version of Nautilus Ubuntu uses.
To add the nautilus-typeahead PPA to Ubuntu, run:
sudo add-apt-repository ppa:lubomir-brindza/nautilus-typeahead
Followed by:
sudo apt dist-upgrade
Look at the changes presented and, if you’re happy to proceed, press the Enter/Return key.
Once install is complete, restart Nautilus from the command-line (to ensure that all changes take effect immediately):
nautilus -r
That’s it.
Open a folder in Nautilus and press a letter on your keyboard. The file manager will instantly jump to the first matching result.
You can continue to use regular full-text search in the Nautilus file manager by clicking on the search icon in the toolbar.
If Ubuntu updates Nautilus the typeahead feature will stop working until the PPA maintainer updates their repo to match the version number. You can pin the package provided by the PPA to prevent it being upgraded (or, if you’re lazy, just be mindful when running the Software Updater tool).
Undo these changes
If you encounter any bugs while using this PPA or you decide you want to return to the way the stock version of Nautilus behaves just remove the PPA using the PPA Purge.
First, install PPA Purge:
sudo apt install ppa-purge
Then, remove the repository:
sudo ppa-purge ppa:lubomir-brindza/nautilus-typeahead
This shows you a list of packages to be removed and/or downgraded. If you’re happy with what’s shown just hit that Enter key and the switch will take place.
Finish up by restarting Nautilus.
Thanks to Tuomo S.

