
LibreOffice 5.3 was released recently, and among its features is an experimental Microsoft Office style Ribbon toolbar layout.
And you may be wondering how to enable it.
Well, we’ll show you how to enable the notebookbar toolbar in LibreOffice 5.3 in just a tick — first we need to recap why the feature is there in the first place.
We need to talk about MUFFIN.
MUFFIN in LibreOffice
MUFFIN is an acronym. It stands for ‘My User Friendly & Flexible INterface’. You can see why we’ll just call it MUFFIN.
Why you need to know about MUFFIN is that it, under the auspices of choice, introduces 4 different toolbar and panel layouts in LibreOffice applications. Among these is the Ribbon style tabbed UI we written about before, and a slim, simplified, single panel notebook bar that will appeal to fans of minimalism.
“The MUFFIN concept is … going to be available starting from LibreOffice 5.3 either as a standard or experimental feature: the Default UI (with toolbars), a Single Toolbar UI, the Sidebar with a Single Toolbar, and the new Notebook Bar (experimental),” explains an explainer post on the project’s aim.
Each layout is designed to appeal to a different subset of users. LibreOffice’s designers feel the one-size doesn’t make sense in a world where generational divides between users alter their expectations from office software interfaces.
Enable the Notebook Bar (aka LibreOffice Ribbon)
With the boring background bit out of the way, let’s look at how to enable the Notebookbar (aka Ribbon ui) in LibreOffice 5.3.
If you’re wondering why I keep specifying the version number it’s because the instructions that follow will only work in v5.3 or later.
I’m also going to run through this guide using LibreOffice Writer )because it’s the only app in the suite I ever use) but it should (in theory) work exactly the same in other the rest of the suite too.
Enabling the notebook bar UI (and the other new toolbars) is relatively straightforward, and only takes a couple of clicks:
The first thing you need to do is ‘Enable experimental features’ in LibreOffice.

To do this:
- Click on the menu
Tools > Options - Select ‘LibreOffice’ > ‘Advanced’
- Check ‘Enable Experimental Features’
- Press ‘OK’
Atfer clicking okay you’ll be prompted to restart LibreOffice (yep the app, not your PC) so that the changes you requested can take effect.
Click ‘Restart Now’.
Once the suite pops back up you’ll instantly notice that things look …absolutely no different to how they did before.
Head to the new View > Toolbar Layout menu.

You’ll see a set of 4 toolbar layouts in LibreOffice 5.3:
- Default (Classic Toolbar)
- Notebookbar
- Single Toolbar
- Single Toolbar + Sidebar
This article is specifically focused on the ‘Notebookbar’ option (aka the ‘Ribbon’ UI), but we’ll recap the other options briefly anyway.
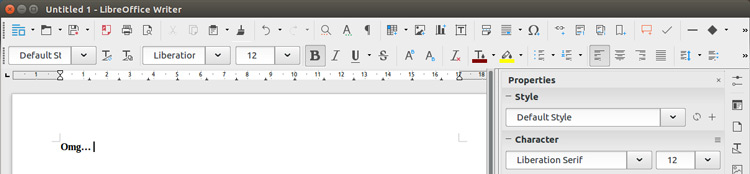
Select the ‘Default’ look if you’re happy with the way things have been for the past few years:
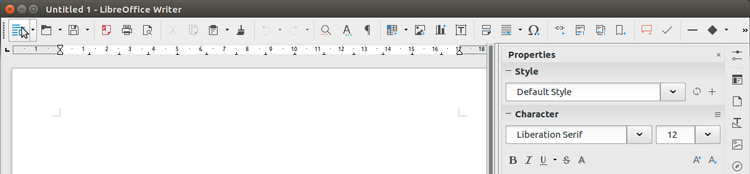
The “Single Toolbar” layout offers a streamlined and simplified workspace:

The “Sidebar” toolbar layout is suited to those who like the default approach but wish things were a little more organized and a little less cluttered, with the second row of icons hidden:
The “Notebookbar” is the “Ribbon”-esque layout. While it’s not a carbon copy of the Microsoft Ribbon you’ll see in modern versions of Microsoft Office, it’s the closest referential analog we have:
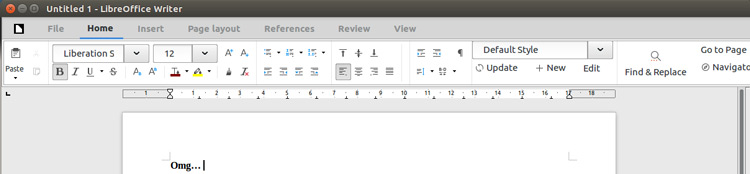
Notebookbar Layout
With the Nootebookbar toolbar layout selected you’ll notice another sub-menu in View, this time related to the sort of ‘notebookbar’ layout you want:
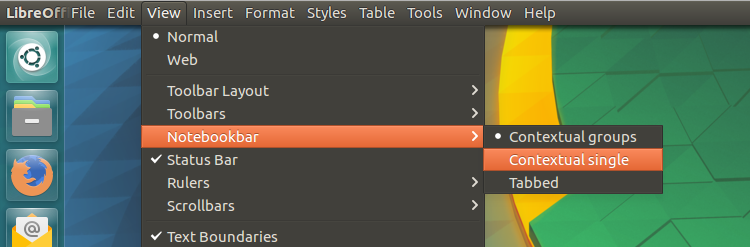
“Tabbed” is the default arrangement and is the one you’ll (probably) want to use.
But you also get two other choices: ‘Contextual Groups’ (pictured below) and a super streamlined ‘Contextual Single’. Both of these group options based on what they do, and hide buttons, toggles and switches that are unlikely to be relevant.
