


With the Ubuntu Touch Preview images now available I predict that, round about now, your will is buckling under the weight of curiosity; you want to try it out.
Assuming you’ve read all of our earlier ‘posts’ on the state of the preview and what you should realistically expect, here’s our thorough how to on installing it on a Nexus device of your own…
Add the Phablet PPA
The first step is to add the official Ubuntu Phablet Tools PPA. Since you’re flashing an image on a Phone I’m going to assume you know how to use the command line.
Open a new Terminal and enter the following two commands, entering your user password when prompted:
sudo add-apt-repository ppa:phablet-team/tools

sudo apt-get update && sudo apt-get install phablet-tools android-tools-adb android-tools-fastboot
Prepare Your Nexus Device
First things first: make a back-up of any important photos, musics, apps, etc.
Also jot down your Android build number (available in Settings > About Tablet/Phone). You’ll need this if you want to re-install Android later.
With the caveats catered for, let’s go ahead and set up your device for ‘flashing’.
Enter Bootloader
On Nexus devices:
- Shutdown Android
- Hold in (press) the power button, volume up and volume down keys at the same time
- Keep holding until you see an up-turned Android image and large text reading ‘Start’
- Attach the device to your computer using its USB cable
You’re now ready for unlocking.
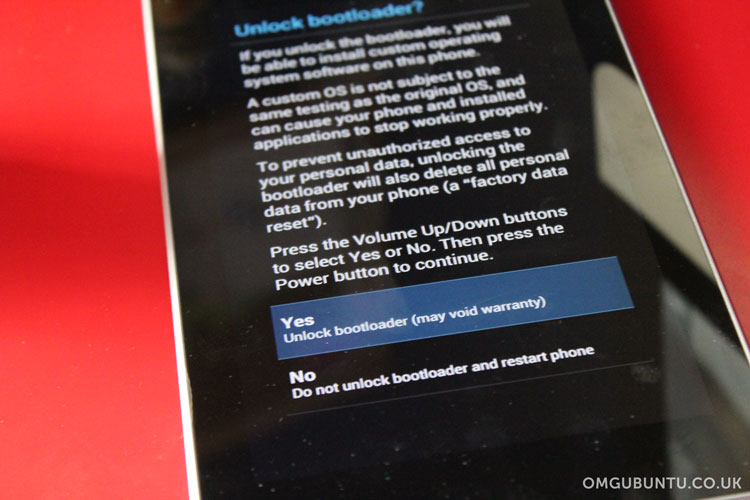
Unlocking Your Device

Having followed the above steps you now need to open a Terminal window and run the following command.
This will unlock your device and allow you to flash the Ubuntu Touch Preview.
fastboot oem unlock
Accept the terms and let it do its thing.
Reboot Into Android
With your Tablet freshly unlocked we need to re-enter Android to enable USB debugging. It sounds boring, but it’s essential.
If you’re still at the Android boot loader (upturned Android screen):
- Press the ‘power’ key next to the ‘Start’ text
Inside Android (I’m assuming everyone is running Jellybean) we enable USB debugging like so:
- Open Settings > About Tablet/Phone
- Tap ‘Build Number’ (at the very bottom) 7 times in a row
- Go back to Settings
- Click the ‘Developer’ entry
- Enable USB debugging
if you’re running Android 4.2.2 you’ll now need to restart adb in Ubuntu.
adb kill-server; adb start-server
Now re-attach your Tablet/Phone to Ubuntu using the USB cable. A pop-up will appear asking you to accept a host key. If you want to install Ubuntu Touch Preview you’ll need to accept…
Installing Ubuntu Touch Preview
Rightio – time for the most important (and scary!) step: installing Ubuntu Touch itself!
Open a new Terminal window and run:
phablet-flash -b
Read over the text that appears and, if you’re willing to go ahead, type ‘yes’ and hit enter.
Phablet Tools will now fetch the latest image for your device and proceed to install it. As mentioned at the outset this will erase everything on your device.
Boot Into Ubuntu
Once all the above has completed (be patient, it takes a bit of time) all that’s let is to boot into Ubuntu!