For when turning the volume up to 10 isn’t enough…
Veromix plasmodia for KDE offers many features, including per-app volume control, configurable equaliser and global hot-keys, but it also allows you to increase system volume past the default 100% point, thus making it handy when encountering a barely audible movie or audio file.
Reader Ovidiu-Florin sent in a step-by-step guide for us to share with you on installing and configuring Veromix for this purpose.
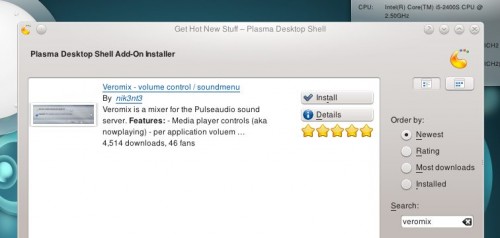
- Right Click on your Desktop and choose Add Widgets > Get New Widgets… > Download New Plasma Widgets
- In the search box enter ”Veromix” (without quote marks)
- Click the ‘Install‘ button on the one result returned
- Close the window, Right click on your desktop again and select “Add widgets“
- Find the “Veromix” widget and drag it to your desktop
- Right click on the widget and select “Veromix Settings”
- Now, on the left, select “Pulseaudio”
- Now on the right you have the field “Max volume value”, enter here the maximum value you wish. I don’t recommend going over 200 as you may destroy your speakers (in the case of notebooks)

- Click “OK” to apply the changes
- Now you can scroll your volume through the Veromix widget up to your selected value or, if you prefer, you can drag your widget in your panel
If you prefer to keep your desktop clear of clutter you can drag the Veromix plasmodia to your panel. Once added it will look like the standard volume icon only a little larger. Use the mouse wheel (scroll) to increase / decrease the volume while the pointer is on top of the widget. The standard volume of your computer will still go up to 100% but Veromix will make it louder.


