The Galaxy Nexus – such a great phone, and one that wows anyone who uses it.
But there is one area in which the phone falls short: getting it hooked up to my Ubuntu laptop.
This is because Google has moved away from the USB mass storage protocol, which was used up till Android 2.3, to the MTP (Media Transfer Protocol). As such, any phone or tablet with Android 3.0 and above will use the MTP protocol – something which doesn’t work too well with Ubuntu out of the box.
Thankfully it took me just two minutes of Googling to find out the solution for getting my Galaxy Nexus up and running with Ubuntu.
Why abandon USB Mass Storage?
As explained by Google Engineer Dan Morrill, the USB mass storage protocol was a block-level protocol. What this meant was that a partition could not be mounted on two different systems at the same time. Each partition that needs to be mounted on a computer must be unmounted from the phone first. This would be impossible on a phone with only a single partition, since if the system partition was unmounted, the phone would crash.
To work around this issue, Android phones up until now either had two partitions in the internal memory (like the Nexus S) or had a microSD slot (like the Samsung Galaxy S II). Phones with micro-SD slots would just export the microSD card partitions to the connected computer.
But the Galaxy Nexus only has a single internal partition. Other Ice Cream Sandwich phones in the future are likely to follow suit.
According to Google Engineer Dan Morrill, the advantages of the single partition approach are that “no more staring sadly at your 5GB free on Nexus S when your internal app data partition has filled up — it’s all one big happy volume.”
So Google has made the move on to MTP, to enable phones with single large partitions to connect to a computer with nearly the same results as USB mass storage. I’d personally prefer a phone with MTP rather than a phone with two tiny partitions.
Connecting your Ice Cream Sandwich phone or tablet to Ubuntu for file access
Before you begin, try plugging your phone in and see if it works straight away. At the time of writing, the only official Android Ice Cream Sandwich phone is the Galaxy Nexus, and mine doesn’t work. But future ICS phones might work, depending on whether they have an SD card slot or not, and whether they support exporting the card as USB mass storage. If it works, you should be good to go.
First up, install the necessary tools:
sudo apt-get install mtp-tools mtpfs
Now, connect your Galaxy Nexus to your computer. On your phone, open up the notification drawer, and click on “USB Connection type”. Make sure that MTP is selected.

Then, run these commands:
mtp-detect | grep idVendor
mtp-detect | grep idProduct
You shall get an output like this:
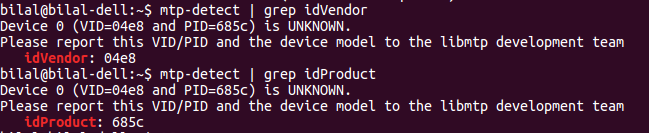
Note down the numbers written in front of idVenfor and idProduct, you’ll need those later on.
Now, run this commands:
gksu gedit /etc/udev/rules.d/51-android.rules
A gedit window should open up. Type this text in it, all in a single line:
SUBSYSTEM==”usb”, ATTR{idVendor}==”VENDORID”, ATTR{idProduct}==”PRODUCTID”, MODE=”0666″
Replace VENDORID with the idVendor you had noted down earlier. Similarly, replace PRODUCTID with the idProduct you had noted down. In my case, they were 04e8 and 685c respectively, but they might have been different for you.
Also, remember to re-type the quotes in the line after you’ve copied and pasted it, otherwise udev may output an error.
If you’re in doubt, you can copy the same line from this pastebin instead and then replace PRODUCTID and VENDORID as needed.
Save and close the file. Then, disconnect your phone and run these commands:
sudo service udev restart
sudo mkdir /media/GalaxyNexus
sudo chmod a+rwx /media/GalaxyNexus
sudo adduser YOURUSERNAME fuse
Replace YOURUSERNAME with your Ubuntu user name. Now, run this command:
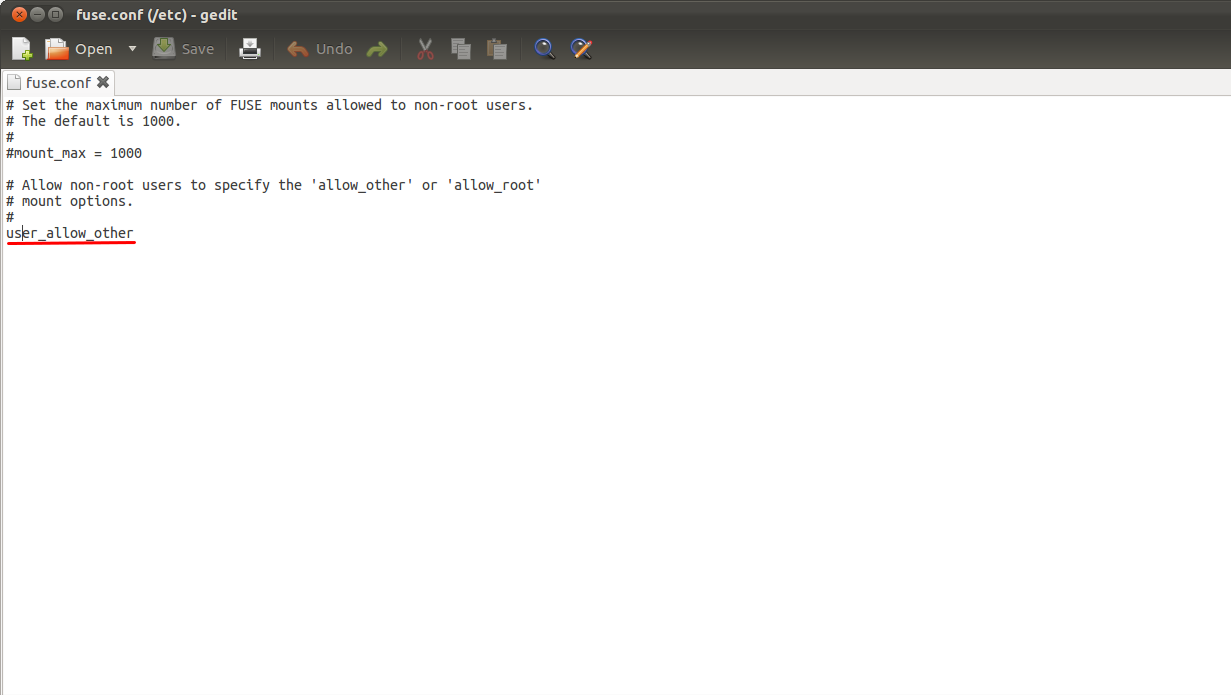
gksu gedit /etc/fuse.conf
In the Gedit window, remove the # at the beginning of the last line (the one that begins with “#user_allow_other”) like this:
You’re almost done! Now, restart your computer, and then run these three commands :
echo “alias android-connect=\”mtpfs -o allow_other /media/GalaxyNexus\”” >> ~/.bashrc
echo “alias android-disconnect=\”fusermount -u /media/GalaxyNexus\”” >> ~/.bashrc
source ~/.bashrc
Again, do re-type the quotes in each command after you’ve copied, otherwise the command won’t work.
Connect your phone again, and then make sure your phone is using MTP, then run this command:
android-connect
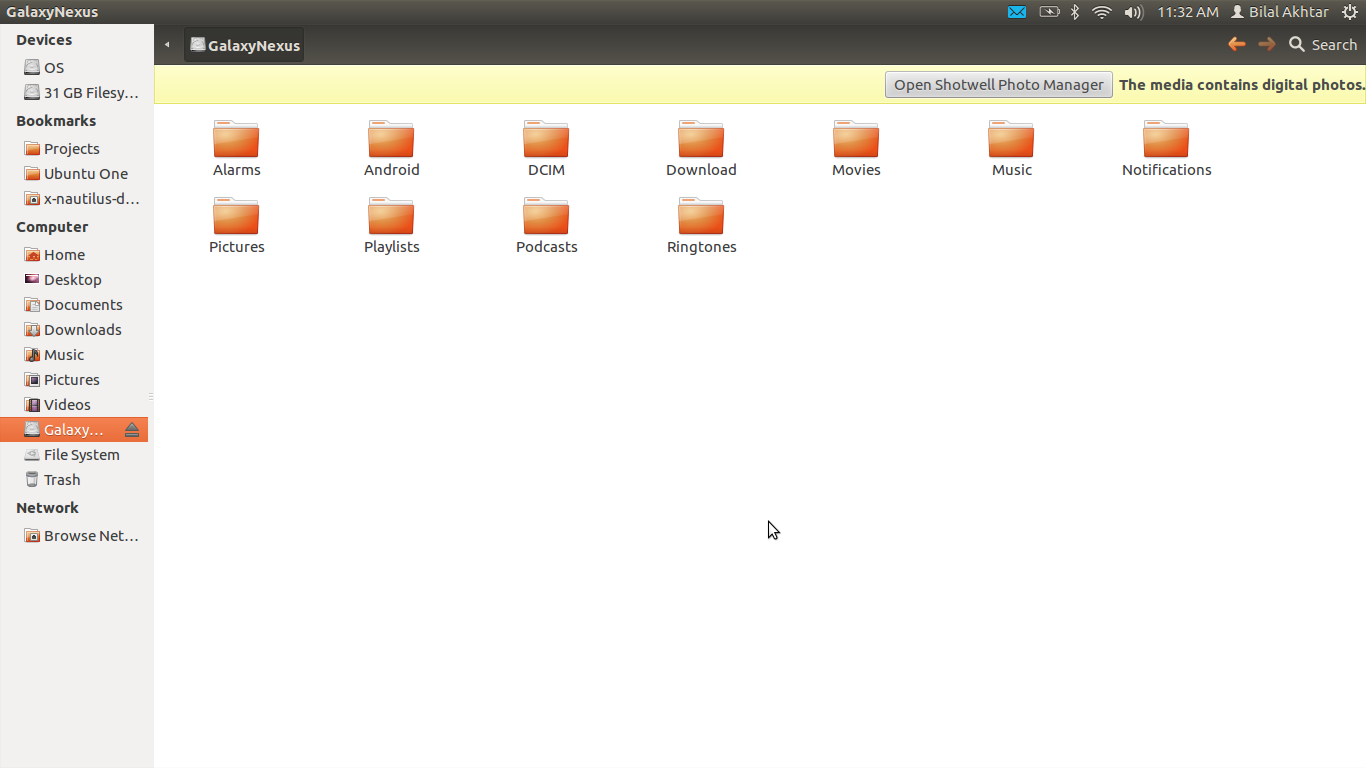
Voila! You can now browse your Android phone contents using Nautilus. Just fire up the file manager, and then in the side bar click GalaxyNexus to browse your phone contents just like you would do with a USB stick. You can also add, remove and modify files just like a normal file system.
You might have noticed that you cannot use the Nautilus eject icon to disconnect the phone. Instead, to safely remove the phone, just run the command:
android-disconnect
From now onward, you just need to run android-connect to mount your phone and then android-disconnect to safely remove your phone. Everything else should be handled automatically. I tried many ways of getting the mount and unmount to happen automatically on cable connect, but this was the best solution I could come up with.
These two commands won’t require root permissions to run. All users who are members of the fuse user group should be able to run these commands without root access.
That’s it!
You’ve successfully connected your Ice Cream Sandwich phone to your Ubuntu computer. The process may be long for a newbie, but I’m sure someone will come around and make a GUI for all of this so that everything happens smoothly :)