Ubuntu 11.10 finally provides the curious users with an easy, safe way to install and try out ‘GNOME Shell’ – the new desktop interface from GNOME.
This means that unlike previous releases of Ubuntu installing GNOME Shell in Ubuntu doesn’t require the addition of any extra ‘software repositories’, or the running of any dubious scripts: it can be installed directly from the Ubuntu Software Centre with a simple click.
‘GNOME Extras’
To get the ‘best’ GNOME Shell experience in Ubuntu we should also install a number of additional ‘extras’.
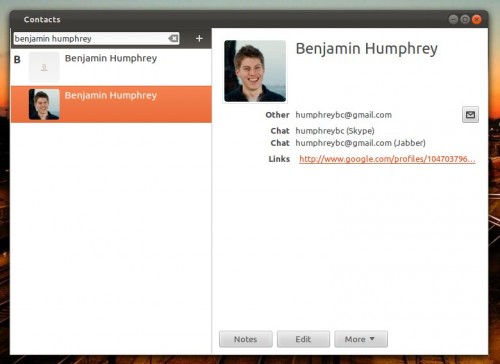
These include GNOME Contacts – a slick Google-integrated address book: –
GNOME Sushi is a handy file preview tool integrates into Nautilus (the default file-manager). To preview an image, movie, audio track or text file just select it with your mouse or keyboard then tap the space key once to ‘peek’ inside: –
GNOME Tweak Tool lets you tweak the way GNOME Shell behaves. Whether you want to enable icons on the desktop, change the system theme, or adjust system font size, GNOME Tweak Tool lets you do it: –
Once all of the above applications have finished installing it’s time to dive on in to GNOME Shell. Hit the ‘Power Cog’ icon in the top right hand corner and choose ‘Log out’. Be sure to save any work or files before doing this.
How to log in to GNOME Shell
Ubuntu’s new login manager makes switching between sessions super easy:
- At the login screen click the ‘cog’ icon to the right of your user name
- Choose the session you want to log into from the menu. For GNOME Shell you’ll want to select ‘GNOME’
- Enter your password and login as normal
Note that GNOME Shell requires 3D acceleration – so be sure that your computer is capable of running it or you’ll enter the ‘fall back’ version of GNOME 3.
A basic overview of GNOME Shell
On first arrival to the GNOME Shell desktop you could be forgiven for wondering whether all is as it should be as the default ‘set up’ is super stripped back.
But this ‘minimal’ approach works in GNOME Shell’s favour. By keeping all of the clutter one would normally associate with a desktop (launchers, icons, files, etc) you are always presented with a ‘blank canvas’ free of distraction and ready for work or play.
Below is a basic orientation of the default GNOME Shell layout and the important locations/features. Right-click on the image and ‘Open in new tab’ to view it full size.
Enabling the default GNOME Theme ‘Adwaita’ in Ubuntu 11.10
Although Ubuntu’s Ambiance and Radiance themes look fine in GNOME Shell you might wish to take the ‘official’ GNOME theme ‘Adwaita’ for a spin.
Excusing the insanely large window borders and slanted tabs, Adwaita is a sublime looking ‘light’ theme (although a ‘darker’ varient is used on some applications).
To enable ‘Adwaita’ we need to: –
- Open ‘System Settings’ from the furthest right-hand menu.
- In the window that opens we will select the ‘Appearance’ option.
- From here use the drop-down box at the bottom of the window to choose the ‘Adwaita’ theme.
- Log out and back in to see the theme take full effect.
How to change icon theme in Ubuntu 11.10
So we know how to change themes – but what about icon sets? For this we need to open the ‘Advanced Settings’ we installed earlier as part of the ‘GNOME Extras’ step.
- Hit ‘Activities’, type ‘tweak’ and click on the icon for ‘Advanced Settings’ when it appears
- Once Advanced Settings has opened choose ‘Theme’ in the left-hand column
- Select an icon set from the drop-down box next to ‘Icon theme’
- It is instantly applied
GNOME Shell Tips
GNOME Shell also sports some pretty handy hidden features, including a built-in screen-recorder. Right click on the image and open in a new tab to view full size.
Even more
Now GNOME-Shell is easily accessible in Ubuntu we’ll be posting more guides, tips, themes, and apps for GNOME Shell over the coming weeks – so be sure to stick around.
