Installing Nvidia drivers manually isn’t as big of a deal as it sounds. It’s literally a few button pushes, a round of “Ok”, “Ok”, “Ok” and a reboot. In many respects it’s the easiest way to get your graphics card up and running if the Hardware Manager doesn’t do it for you.

The following how-to will help guide you through the process in bite-seized chunks. At the end of the tutorial is a “recap” that you may wish to write down before trying.
Why would you want to install Graphics drivers manually?
- Your Nvidia Graphics card fails to be detected by the Ubuntu “Hardware Drivers” application
- You feel you’re not getting optimal performance from your hardware
- You want to install a more recent driver version with the latest features and improvements
- You tried a 3rd party application/PPA but it borked your system
Download Your Driver
1. Before all else you’ll need a driver to install. Head to the official Nvidia driver download page :
Use the drop down menus to find the appropriate driver and when you’ve selected the correct categories press the green ‘Search’ button.
2. You’ll then be taken to an overview page, detailing the changes, features and improvements the driver has over it’s previous version as well as the all-important ‘Download’ button for you to press.
 3. A license agreement will present itself to you before the download will appear.
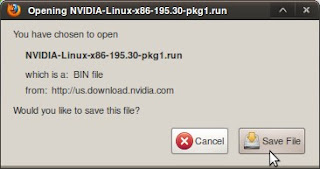
4a. If using Firefox a pop-up will ask you whether you want to ‘Save’ the file.
4b. If using Google Chrome or Chromium the file will save itself automatically.

Beta Drivers
Beta drivers are in-progress version that come with newer features and enhancements. The trade off, however, being potential new issues and instability.
You can get the latest Nvidia Beta Drivers for Linux by clicking the following link:
- http://www.nvidia.com/Download/betadrivers.aspx
Use the steps above to guide you in downloading the driver. Be sure to choose the Driver with the most recent date next to it and the red ‘beta’ label.
Installing Nvidia Graphics Drivers In Ubuntu
First of all SAVE any work you’re currently doing. You’re only a few button-punches away from rebooting, so you don’t want to lose any important work.
Second of all – make sure you have uninstalled any NVidia drivers currently installed – as well as 3rd party application EnvyNG.
If you installed your drivers via the Hardware Manager use the following commands in a terminal.
- sudo apt-get purge nvidia*
Lastly, make some notes of the steps below – you can’t read it and install at the same time!
Move your downloaded Nvidia driver into your home folder. Just the home folder. Not into any other folder.
- Press ‘CTRL+ALT+F1’
- You will need to login with your user-name and password
- Type the following: ‘sudo service gdm stop’ (Minus apostrophes’)
- Press return/enter
- Type: ‘sudo sh ./NV’
- Press the tab button tol auto-complete the rest of the name.
- Hit return/enter
During the following process you will want to agree (that’s press ‘Ok’, yes, sure, why not, etc) to the following things
- License Agreement
Now, I’m pretty certain that you’ll want to agree to this – you can’t complete installation without doing so. Press the left-arrow key so ‘Yes’ is highlighted. Press Enter.
You may be prompted with a dialogue informing you that
- “There appears to be a driver already installed”
If you get this, agree by selecting ‘Yes’. The current driver will be uninstalled and then replaced with the new one.
The kernel module is then built and the driver installed.
- “replace current xorg.profile”
MAKE SURE you agree to it updating your xorg.profile. If you don’t then you’ll be greeted with a low-graphics, blinking bash-shell nightmare!
Finishing Up
You’ll be returned to the “command line” whereby you need simply type
- sudo reboot
to restart your machine.
Recap
1: Download driver from the Nvidia driver site
2: Press ALt+F1 and stop GDM
3: Run driver package
4: Follow installer’s instructions, allowing it to replace your xorg.conf.
5: Restart
Kernel Updates (Or “My Graphics Don’t Work Since I Updated“)
The driver you have installed manually is purposely built against the kernel version you have at the time. As such any kernel updates you install will result in your 3-D graphics driver no longer working.
Kernels updates aren’t incredibly frequent but it certainly helps if you pay attention to what you install via the update manager.
The solution to the kernel update “issue” is simple.
- Reinstall your driver again after a kernel update
or
- Install the script below to do it for you – automatically!
Automatically Re-Install Nvidia Driver After Kernel Updates
It’s probably worth doing this after you’ve installed your driver, so that it doesn’t slip your mind!
Make sure your Nvidia driver is sat in your home folder. Then run the following commands, replacing ‘nvidia-driver-name‘ with the name of your driver: –
(Tip: Renaming your driver to just “nvidia-driver’ may save you time)
- sudo mv nvidia-driver-name-here.run /usr/src
- sudo ln -s /usr/src/nvidia-driver-name.run /usr/src/nvidia-driver
- Download the following script, placing it in your Home folder:
- http://dl.getdropbox.com/u/1115768/update-nvidia
- sudo mkdir -p /etc/kernel/postinst.d
- sudo install update-nvidia /etc/kernel/postinst.d


