Amongst the items I asked Santa Claus for this year was a new microphone so I can improve the quality of voice-overs in our YouTube videos.
The famous white-bearded one (no, not Gandalf!) kindly obliged, putting a Blue Yeti device under my tree.
Whilst the official documentation for the Yeti name-checks compatibility with Windows and Mac OS it doesn’t mention Linux.
Thankfully getting the USB-powered microphone set up in Ubuntu is painless.
Setting Up Blue Yeti in Ubuntu
- First step is to connect the microphone to your PC via the USB cable
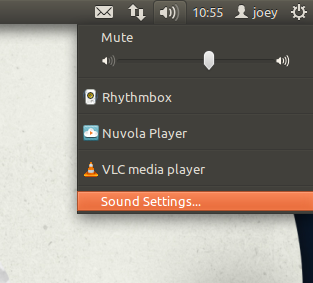
- Open ‘Sound Settings‘ option present in the Ubuntu Sound Menu
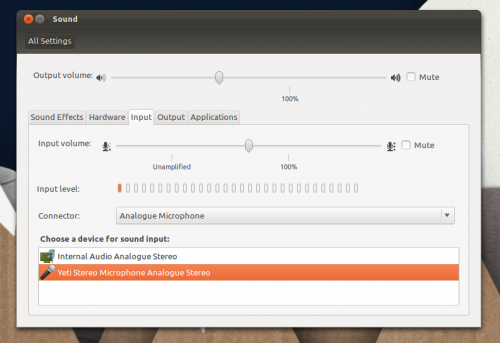
- Select the ‘input’ tab from the Sound Settings window
- Under the section headed ‘Choose a device for sound input’ select ‘Yeti Stereo Microphone’

Your Yeti is now set-up for recording. To test how well its working, and whether you need to adjust the gain on the microphone, use the ‘Sound Recorder’ application that ships with Ubuntu by default.
Lastly, and this step is optional, to enable use of the external headphones jack on the Yeti repeat the above steps but choose ‘the output’ tab and select the Yeti option.
When sound is set to output through the Yeti it will not output through your internal soundcard/speakers.


