 Dual-booting on a PC is easy: you stick in a LiveCD disk, drum your fingers for a few minutes then let the installer take care of all the difficult stuff.
But how does one dual-boot Ubuntu on a Mac?
It’s actually not that difficult; there are various guides and how-to’s on the internet. But to help clarify the process I thought I would share the method I use.
Whilst I don’t guarantee that it will work for you (although in all honesty it should), be sure to make a back up of anything vital before attempting this. Seriously, do it.
Ready? Let’s begin…
Step One: Install rEFIt
Unlike a typical PC where the GRUB boot-loader is used to present your dual-boot options, Intel Mac users need to install something extra: ‘rEFIt’.
‘rEFIt’ is a visually slick (think BURG) boot-interrupter that allows you to boot between OS X and your Linux distribution(s) of choice.

rEFIt should be installed from within OS X, and doesn’t require the use of too many braincells to accomplish: –
- Download the rEFIt-0.14.dmg disk image and ‘mount’ it in OS X by double-clicking on it
- Inside the ‘rEFIt’ folder accessible from Finder, double-click on the “rEFIt.mpkg” package.
- Follow the instructions and select your Mac OS X installation volume as the destination volume for the install
If everything went well you will see the rEFIt boot menu appear on your next restart.
For extra peace of mind create a bookmark to the ‘Troubleshooting section‘ of the rEFIt website incase any issues arise.
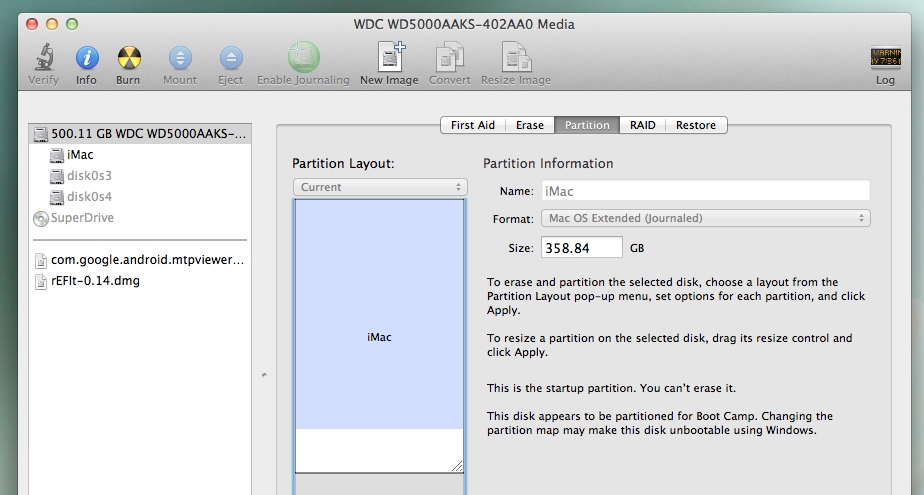
Step Two: Resize OS X
The next step is to make some space for your Ubuntu install. I typically do this in OS X because it’s easier.
- Open Disk Utility in OS X
- Choose your main hard-drive from the left hand pane
- Choose the ‘Partition‘ tab
- Click the ‘+‘ sign to the bottom of the harddrive window and create a new partition by dragging the slider. You can also specify a partition size directly in the size box
- For ‘Format‘ choose ‘Free Space’ (this will help us easily identify the partition later on)
- Apply
Be generous when allocating disk space you need as trying to change it later can lead to all sorts of problems.
Step Three: Reboot with a LiveCD in the tray (and connect a wired keyboard and mouse)
Once you’re all set you just need to pop your LiveCD into the disk drive and reboot.
Press the ‘C’ after the start ‘chimes’ sound to boot from the Live CD.

Step Four: Install to your created partition
If you’re an iMac user using bluetooth peripherals do be aware that these will not work out of the box in Ubuntu, so have a wired keyboard and mouse to hand.
Proceed to install Ubuntu on the ‘free space’ partition you created earlier. Ubuntu may prompt you to install it on freespace (double check the size) or, if it doesn’t or you just want to be super-cautious choose the ‘Advanced’ option from the partition screen.
From here select (check the box under ‘format’) ‘free space‘ and choose the ‘EXT4’ filesystem when asked, and mount point should be set as ‘/’.
The above looks a bit crazy, but once you’re in the partition editor of the LiveCD it’s straightforward.
I should also add that I don’t usually bother adding Swap space but you may wish to.
Step Five: Reboot
Once all is done you just need to reboot your Mac and select ‘Linux’ from the REFit bootloader when it appears.
If you’re using a bluetooth keyboard you will need to press a button on your keyboard and wait a second before you are able to select boot entries with rEFIt.
Thanks to Beau for the idea